Category: Uncategorized


How to Choose the Right Light Colour for Every Room in Your Home
Understanding Kelvin (K)
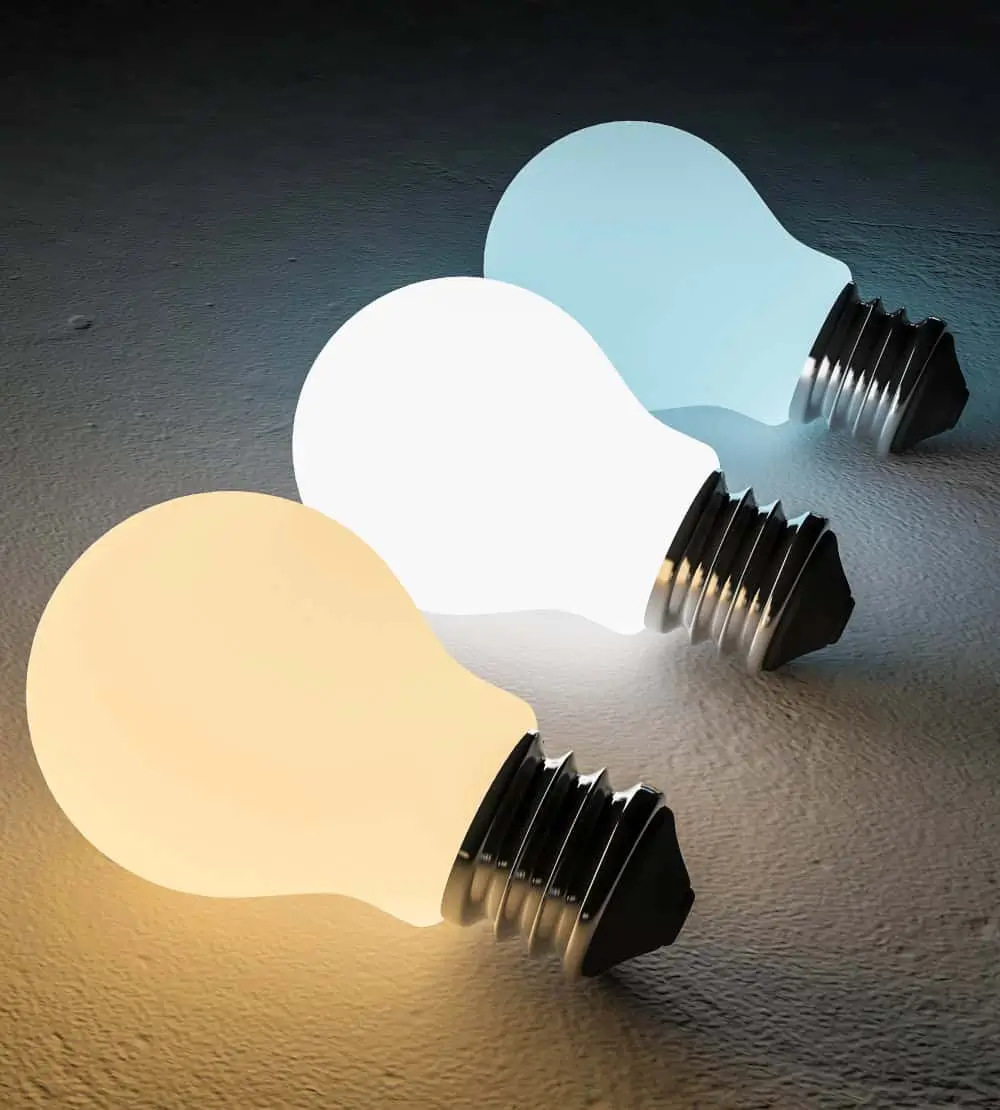
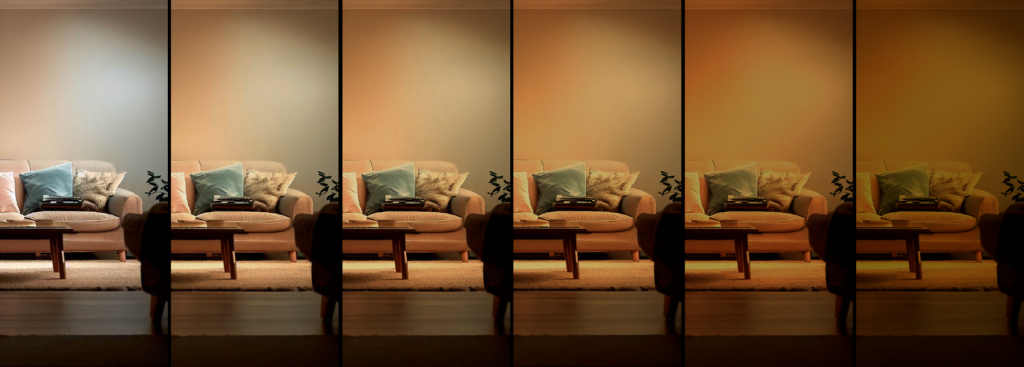
The Kelvin (K) scale measures the colour temperature of light. Lower values represent warmer, yellowish light, while higher values represent cooler, bluish light.
Colour Temperatures Explained
- 2400K or lower: Super warm, almost candlelight-like. Ideal for cozy, intimate spaces such as bedrooms and living rooms. Think “romantic dinner” vibes without the open flame hazard.
- 2700K: Extra Warm white light. Suitable for living rooms, dining areas, and bedrooms, creating a relaxing and inviting atmosphere. This light colour is the same as traditional incandescent lamps.
- 3000K: Warm white light with a slightly more neutral tone. Great for living spaces, kitchens, bathrooms, and workspaces. While the tone of the light is warm, we often describe this light as being crisp. This is the most popular colour temperature we see used across homes, and can work well in all rooms.
- 4000K: Cool white light. Provides a bright, clean light perfect for task lighting in kitchens, offices, and bathrooms.
- 5000K and 6500K: Daylight. Best for detailed tasks, home offices, and working garages, where clarity and focus are essential. Great for when you need to see everything… and I mean everything.
CCT Selectable and Tuneable Fixtures
Some light fittings and lamps offer CCT selectable colour temperature options or Tuneable colour. These fixtures allow you to switch between different colour temperatures, providing flexibility for various activities and times of day. For example, you can have a warm light for evening relaxation and a cooler light for daytime tasks.
Sunset Dim Technology
Sunset Dim fixtures start at 3000K when fully lit and gradually warm to a more amber glow as they are dimmed. This mimics the natural progression of sunlight and is perfect for creating a cozy, relaxing environment in living rooms and bedrooms.
Can LED Lighting Affect My Sleep?
Studies have shown that the colour of light can significantly affect melatonin production, a hormone that regulates sleep-wake cycles. Exposure to blue light (around 450-480 nm) suppresses melatonin production more than other wavelengths. This is why it’s advisable to minimize blue light exposure in the evening to avoid disrupting your sleep.
- Blue Light and Melatonin Suppression: Blue light impacts the intrinsically photosensitive retinal ganglion cells (ipRGCs), which regulate the circadian rhythm, leading to greater melatonin suppression.
- Warm Light and Melatonin Production: Warmer light (2400K-3000K) has less impact on melatonin suppression, making it ideal for evening use to promote relaxation and better sleep.
Room-by-Room Colour Temperature Guide
Living Room
- Recommended Colour Temperature: 2400K – 3000K
- Why: Creates a warm, inviting atmosphere perfect for relaxation and socializing. Use 2400K for a very cozy feel and 2700K-3000K for a bit more brightness while maintaining warmth.
Bedroom
- Recommended Colour Temperature: 2400K – 2700K
- Why: Promotes a restful and cozy environment. Use 2400K for a very warm, intimate feel and 2700K for a slightly brighter, but still relaxing, light. Sweet dreams are made of these (lights)!
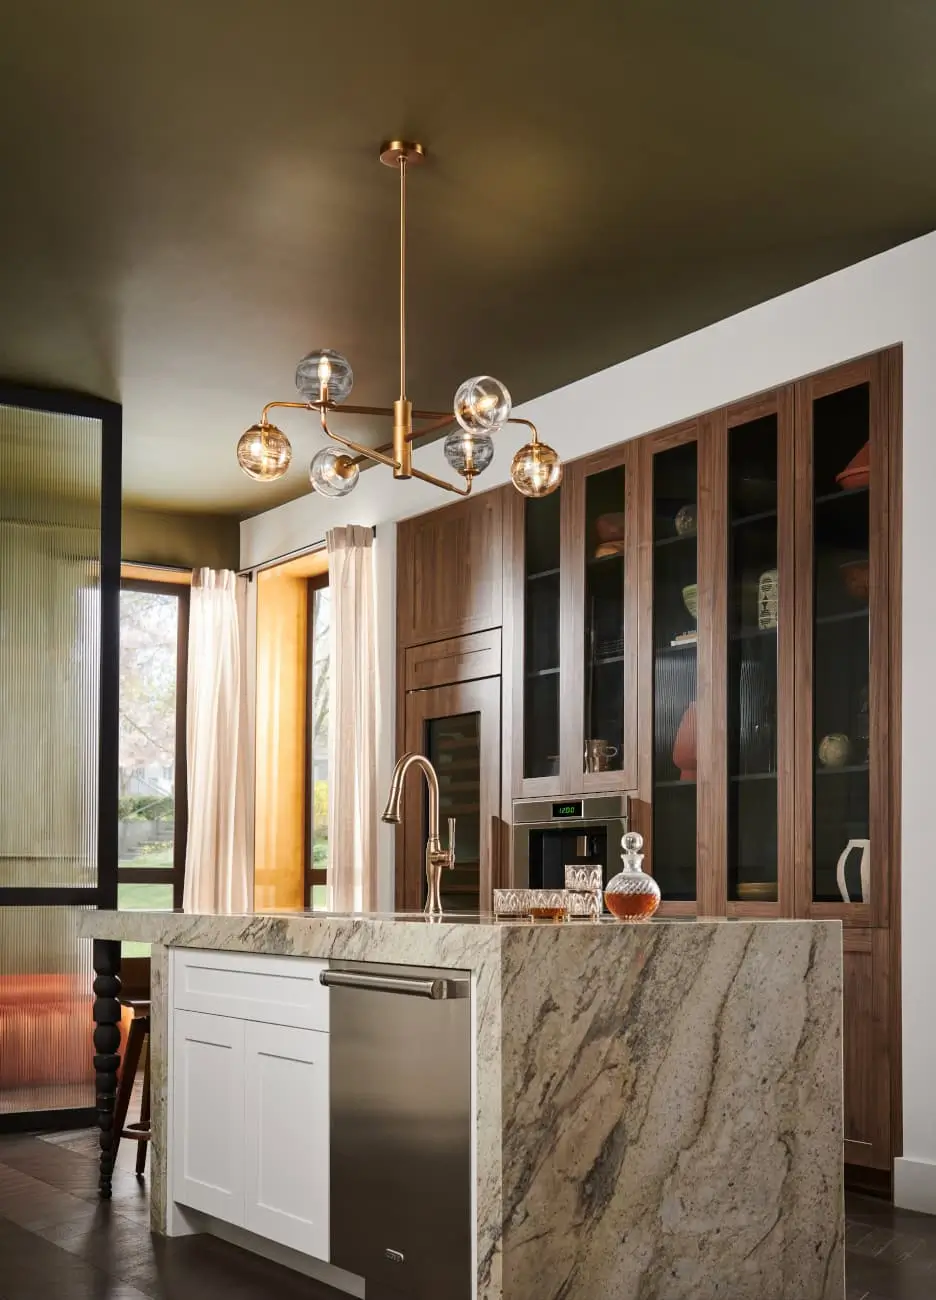
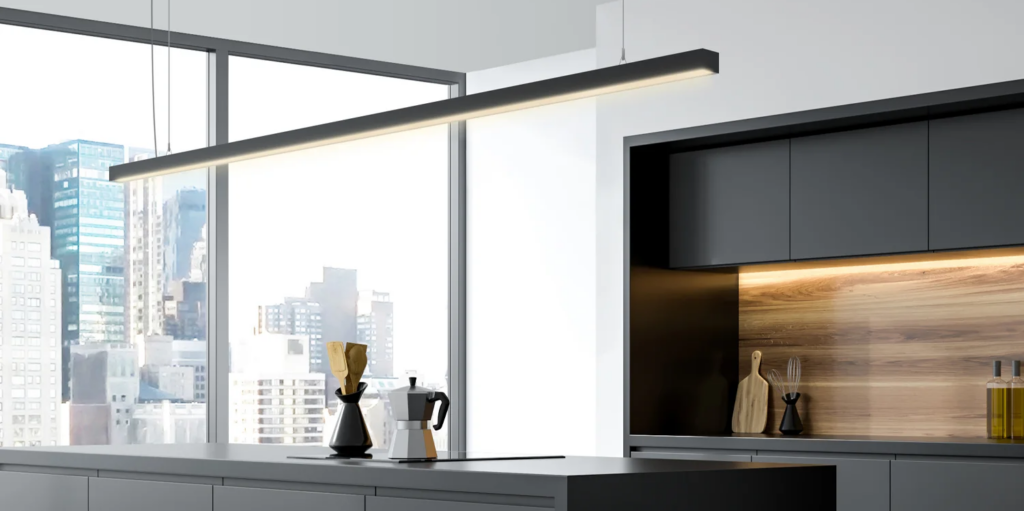
Kitchen
- Recommended Colour Temperature: 3000K – 4000K
- Why: Provides a balance between warm and cool light, offering both ambiance and functionality. Use 3000K for a warmer, inviting kitchen and 4000K for bright, task-oriented lighting. We have been known to use intense 4000K light on work benches while keeping the rest of the living space lighting at 3000K.
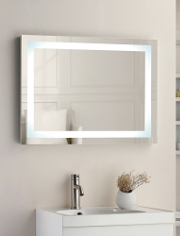
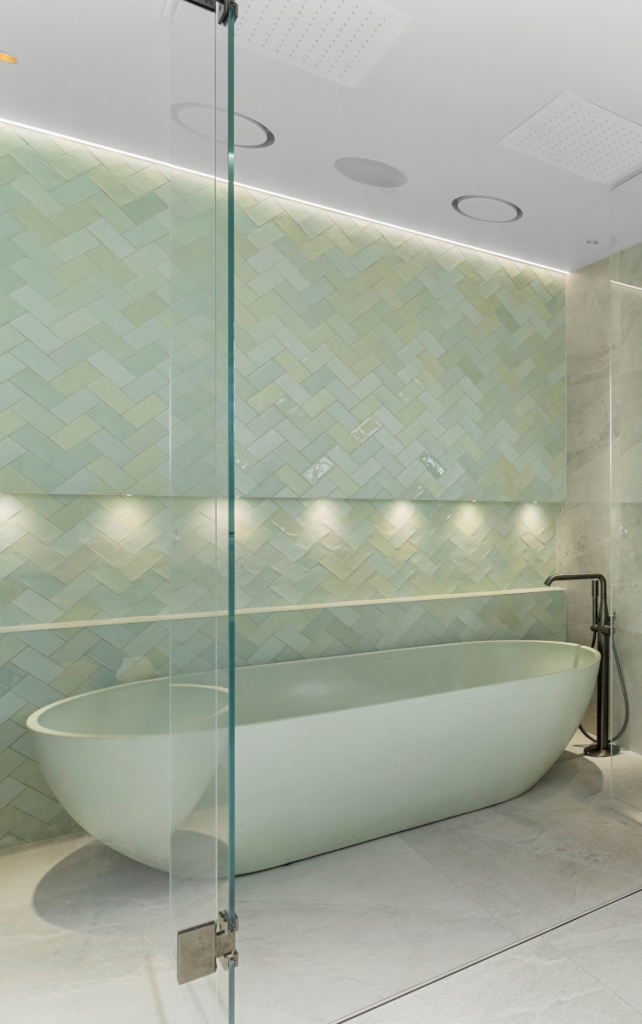
Bathroom
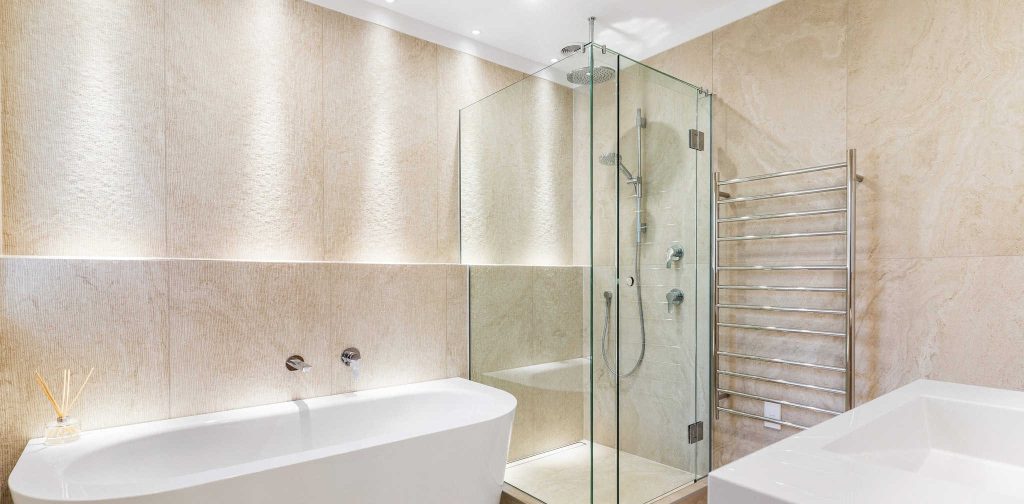
- Recommended Colour Temperature: 3000K – 4000K
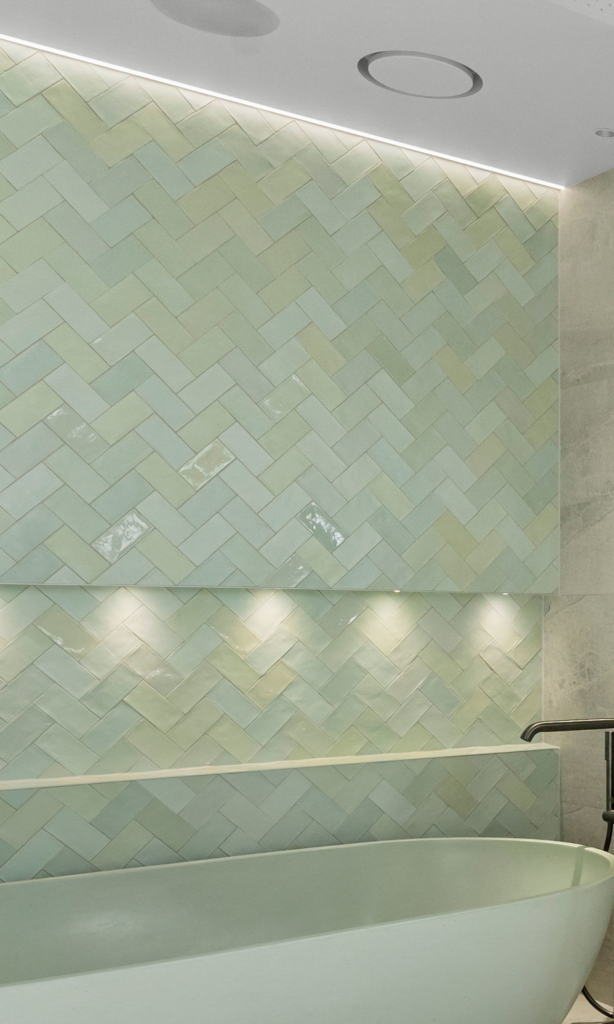
- Why: Ensures bright and clean lighting for grooming tasks. Use 3000K for a warmer tone or 4000K for a cooler, more clinical feel. It’s a good idea to bring a sample of your bathroom tiles into our showroom to see how the different light colours will affect your choice of tiles. It’s also worth incorporating warmer lighting into a bathroom that has a bath; Sunset dimming lights are perfect for this, providing a warm relaxing spa getaway.
Home Office
- Recommended Colour Temperature: 4000K
- Why: Enhances focus and productivity with bright, clear light. Use 4000K for a neutral, clean light that boosts concentration.
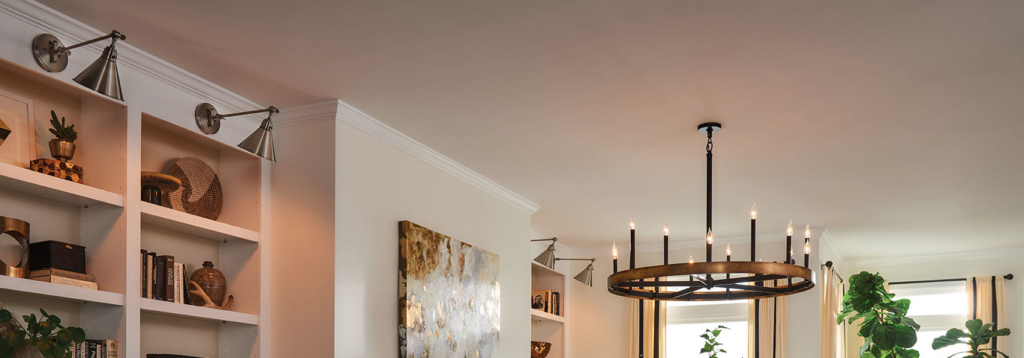
Dining Room
- Recommended Colour Temperature: 2700K – 3000K
- Why: Creates a warm and welcoming environment for meals. Use 2700K for a cozy dining experience and 3000K for a slightly brighter, but still warm, setting. Perfect for making every meal feel like a special occasion.
Garage and Workshop
- Recommended Colour Temperature: 4000K – 6500K
- Why: Ensures high visibility and clarity for detailed tasks and projects. Use 6500K for bright daylight-like light if you intend your garage to be a workshop or space to get projects done.
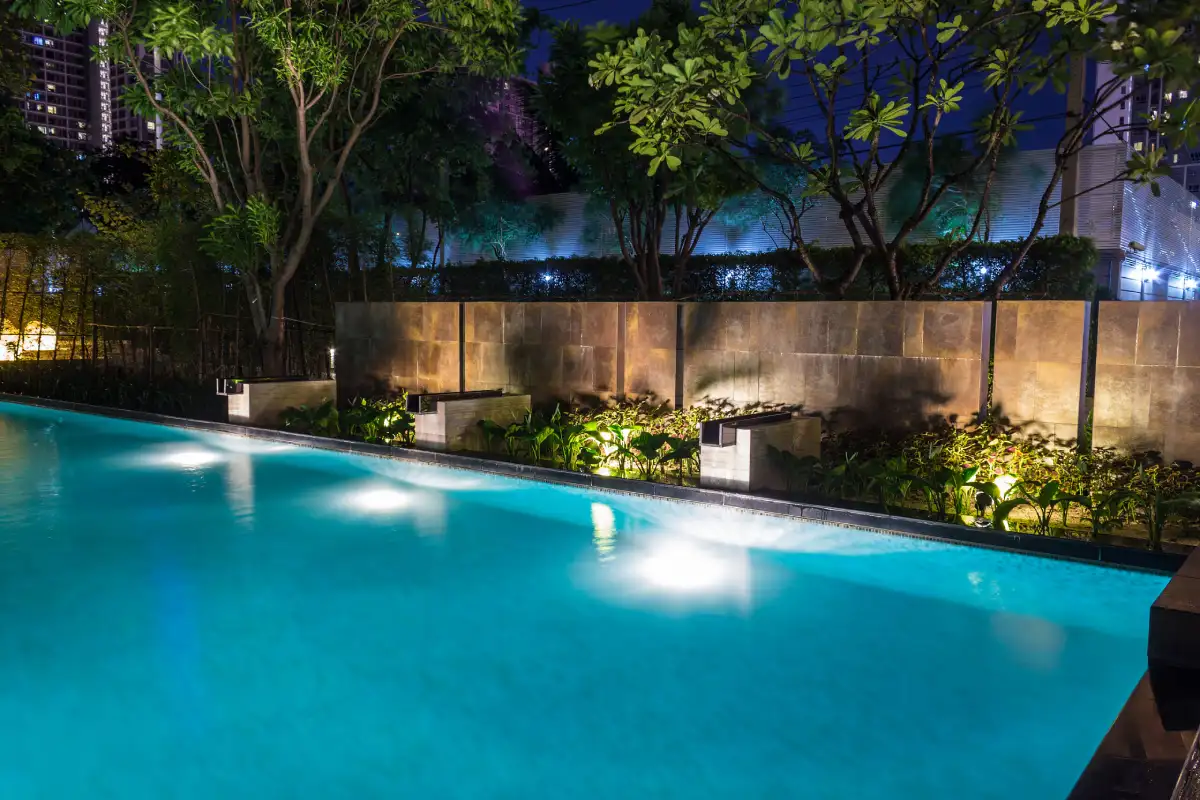
Outdoor Lighting
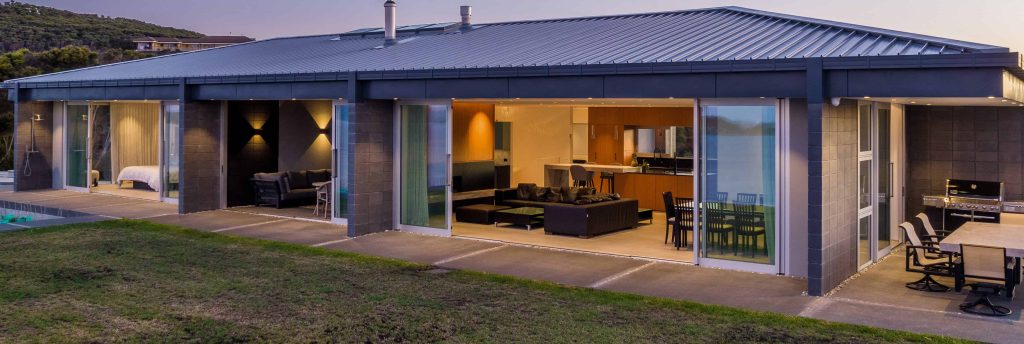
- Recommended Colour Temperature: 2700K – 3000K, consider 4000K for security lighting
- Why: Outdoor lighting can often serve dual purposes: enhancing safety and creating ambiance. Warmer tones, ranging from 2700K to 3000K, are ideal for illuminating garden and alfresco dining areas, creating a beautiful nightscape to enjoy in the evenings. However, for areas where visibility and security are paramount, such as pathways and entry points, cooler tones around 4000K may be more suitable. These cooler temperatures provide clarity and ensure that your outdoor spaces are well-lit and secure, even during the darkest nights.
Tips for Choosing the Right Colour Temperature
- Determine the room’s purpose: Use warmer temperatures (2400K-3000K) for relaxation and cooler temperatures (4000K-6500K) for tasks and workspaces.
- Consider the décor: Warmer lights enhance traditional and rustic décor, while cooler lights complement modern and minimalist styles. You can always visit our showroom to see these colour temperatures in action, maybe even bring your paint colour or a tile sample to see how they will look in your chosen colour temperature.
- Think about the time of day: Use adjustable CCT fixtures to match your lighting to your daily routine, promoting relaxation in the evening and productivity during the day.
By understanding the different colour temperatures and using versatile fixtures like CCT and Sunset Dim, you can create a dynamic and comfortable lighting environment in your home.
Sources:
- Gooley, J. J., Chamberlain, K., Smith, K. A., Khalsa, S. B. S., Rajaratnam, S. M. W., Van Reen, E., … & Lockley, S. W. (2011). Exposure to room light before bedtime suppresses melatonin onset and shortens melatonin duration in humans. Journal of Clinical Endocrinology & Metabolism, 96(3), E463-E472.
- Harvard Health Publishing. (n.d.). Blue light has a dark side. Retrieved from Harvard Health
- Chang, A. M., Aeschbach, D., Duffy, J. F., & Czeisler, C. A. (2015). Evening use of light-emitting eReaders negatively affects sleep, circadian timing, and next-morning alertness. Proceedings of the National Academy of Sciences, 112(4), 1232-1237.
How to Select the Right Spotlights for Your Home


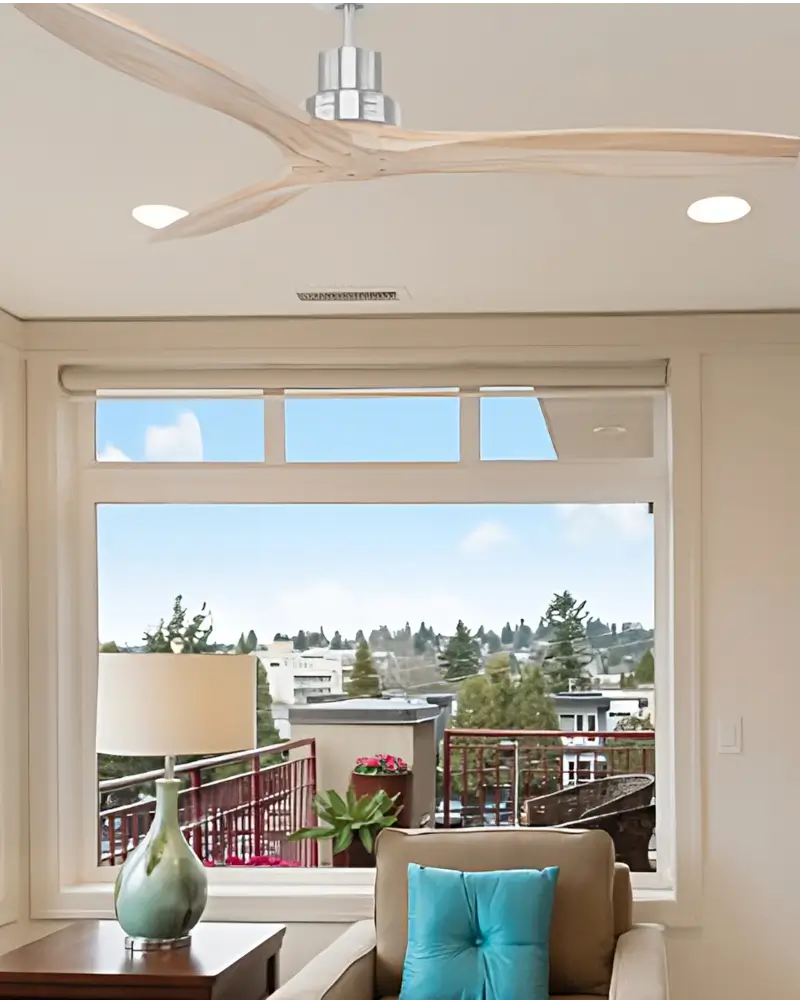
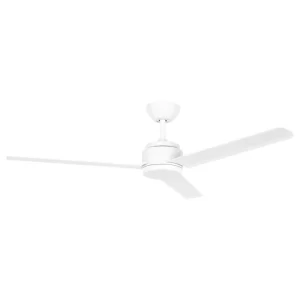
Top Ceiling Fans for 2024
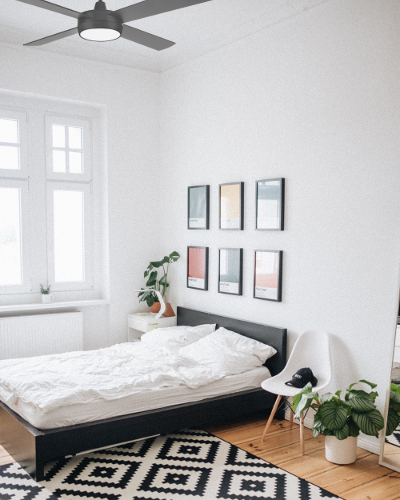
Top Bedroom Fans
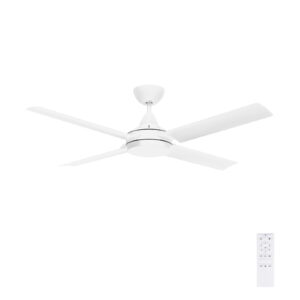
Bedroom fans need to be quiet and the quietest fans have ABS blades along with DC Motors, one of our top value for money fans is the Tempest DC Fan, this is range is available with light or without light and there is a remote control option as well.
The Tempest DC Fan even has an Option CCT LED Light Kit, the light colour can be easily changed between Warm White, Cool White and Daylight. Great for multi-use rooms, especially kids and teenagers rooms where you might want to have the option of a cooler light for studying or hobbies.
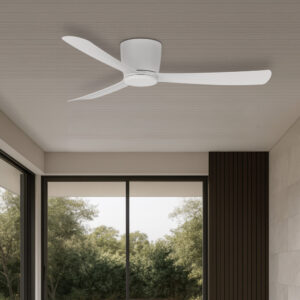
Top Fans for Lounge Spaces
There is no doubt the Bahama Range is a great looking product, the sleek styling of the ABS blades and modern DC Fan Technology sets these fans apart from the rest. The Bahama Range moves air well and is very quiet, perfect for any lounge situation.
The new Bahama Smart Range includes an LED light and smart controls so you can control the fan from the supplied remote or your Android or Apple phone from anywhere in the world. This simple system integrates with your home Wifi (no Hub or extra components required). You can control the Fan, the light, the colour of the light (warm to daylight) and set up smart automation with the simple smart app.

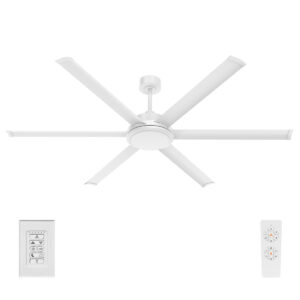
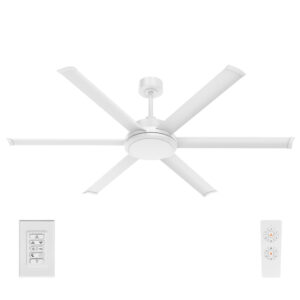
Top Fan for Large Spaces
The Colossus Range of fans is for large spaces, we have used them in warehouses, open plan lounges and even an open stairwell in a architecturally designed home. The size of these fans ranges from 2 metres to a massive 3 metre span. These fans have DC motors for maximum energy efficeiency and strong aluminium blades for maximum air-flow.
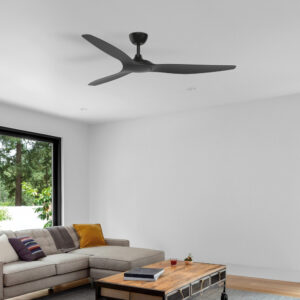
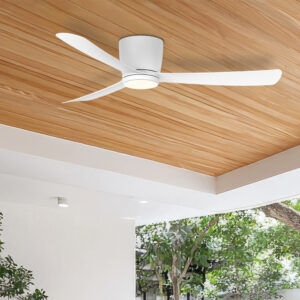
Top Fan for Low Ceilings
For homes with low ceilings, the Preston DC Fan is an excellent choice. With a depth of only 210mm, it can be safely installed on ceilings as low as 2400mm. It includes a quiet DC motor and a 6-speed remote control, combining functionality and style.
See the Full Range of Fans
What Lighting is best for Lower Ceilings?

To optimize the perception of space in rooms with lower ceilings, lighting plays a crucial role. By combining lighting techniques, colours, and materials strategically, you can create a visually expansive and harmonious environment. Consider the following design considerations:
Illuminate Brightly with Lighter Colours
Generally the advice for interior design with low ceilings is to select lighter paint colours for walls and ceilings. Similarly for lighting you should illuminate brightly with cooler colours, using 3000k or 4000k colour temperatures and layering your lighting will give you a bright light effect.
Embrace Ambient and Natural Lighting
Well-planned ambient lighting is vital for creating an inviting atmosphere while maximizing space perception. Incorporate recessed lighting, such as LED downlights, to evenly distribute light throughout the room. Consider installing dimmers to adjust the lighting intensity and create different moods for various activities.
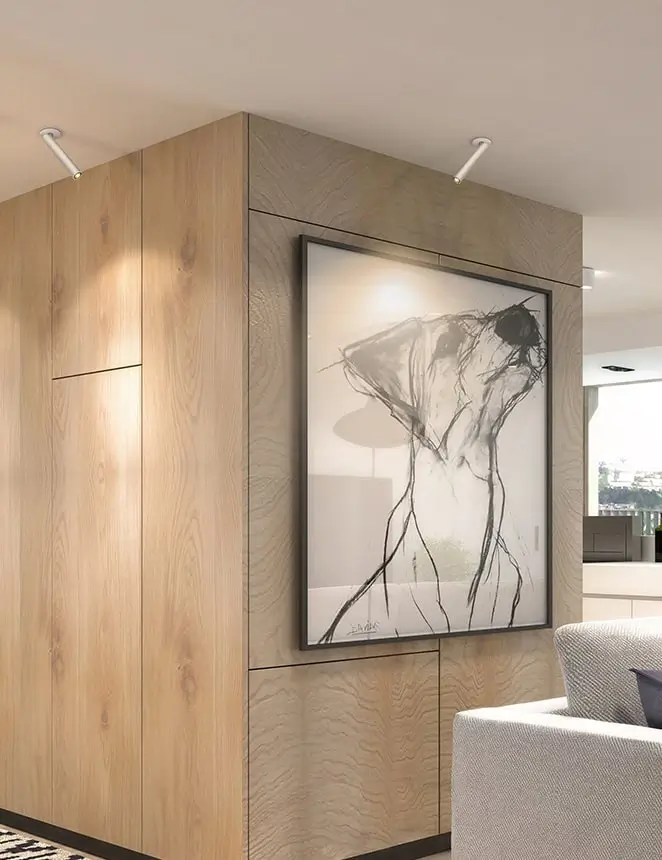
Highlight Architectural Features
Draw attention to architectural elements like beams, columns, or textured surfaces by employing accent lighting. Directional spotlights or wall-mounted fixtures can emphasize these features, adding depth and character to the space. By creating focal points, you divert attention from the ceiling height and enhance the overall aesthetic appeal.
Layer Lighting for Depth
Implementing a layered lighting approach helps create depth and dimension within the room. Combine ambient, task, and accent lighting to achieve a well-balanced and functional lighting scheme. Task lighting, such as under-cabinet lights in the kitchen or bedside reading lamps, serves a specific purpose while adding visual interest.
By focusing on lighting techniques that enhance the perception of space, you can transform rooms with lower ceilings into visually expansive and inviting environments. Remember to experiment with different lighting angles, intensities, and colour temperatures to achieve the desired effect.
Lighting Fixtures
To optimize both space and lighting in rooms with lower ceilings, it’s crucial to explore suitable ceiling lighting fixtures that cater to specific needs. Let’s examine the different options and their impact on the space:
Wide Beam or Medium Beam Downlights
When considering recessed lighting, such as LED downlights, you have the choice between wide beam and medium beam options. Wide beam downlights spread light across a broader area, creating a more evenly illuminated space. This can help make the room feel brighter and larger. On the other hand, lower glare medium beam downlights focus the light more directly, reducing glare and providing a more comfortable visual experience. These fixtures are particularly beneficial in areas where you want to minimize direct glare, such as open plan living spaces.
It’s worth noting that surface-mounted downlights offer a refreshing alternative to recessed lighting. While recessed downlights are popular for their sleek and unobtrusive appearance, surface-mounted downlights provide a break from the abundance of recessed lights while maintaining a modern and contemporary look. These fixtures can be mounted directly onto the ceiling surface, making them easier to install and offering flexibility in terms of placement. Surface-mounted downlights can be strategically positioned to create focused lighting or highlight specific areas, adding depth and dimension to the space.
While recessed downlights to a great job of lighting down, and from lower ceilings the cave-like feeling this can create is even more prevalent. If you use downlights for your main room lighting make sure you layer your lighting and include some more ambient lighting (wall lights, pendants or table and floor lamps) too fill in the darkened wall and ceiling areas with light.
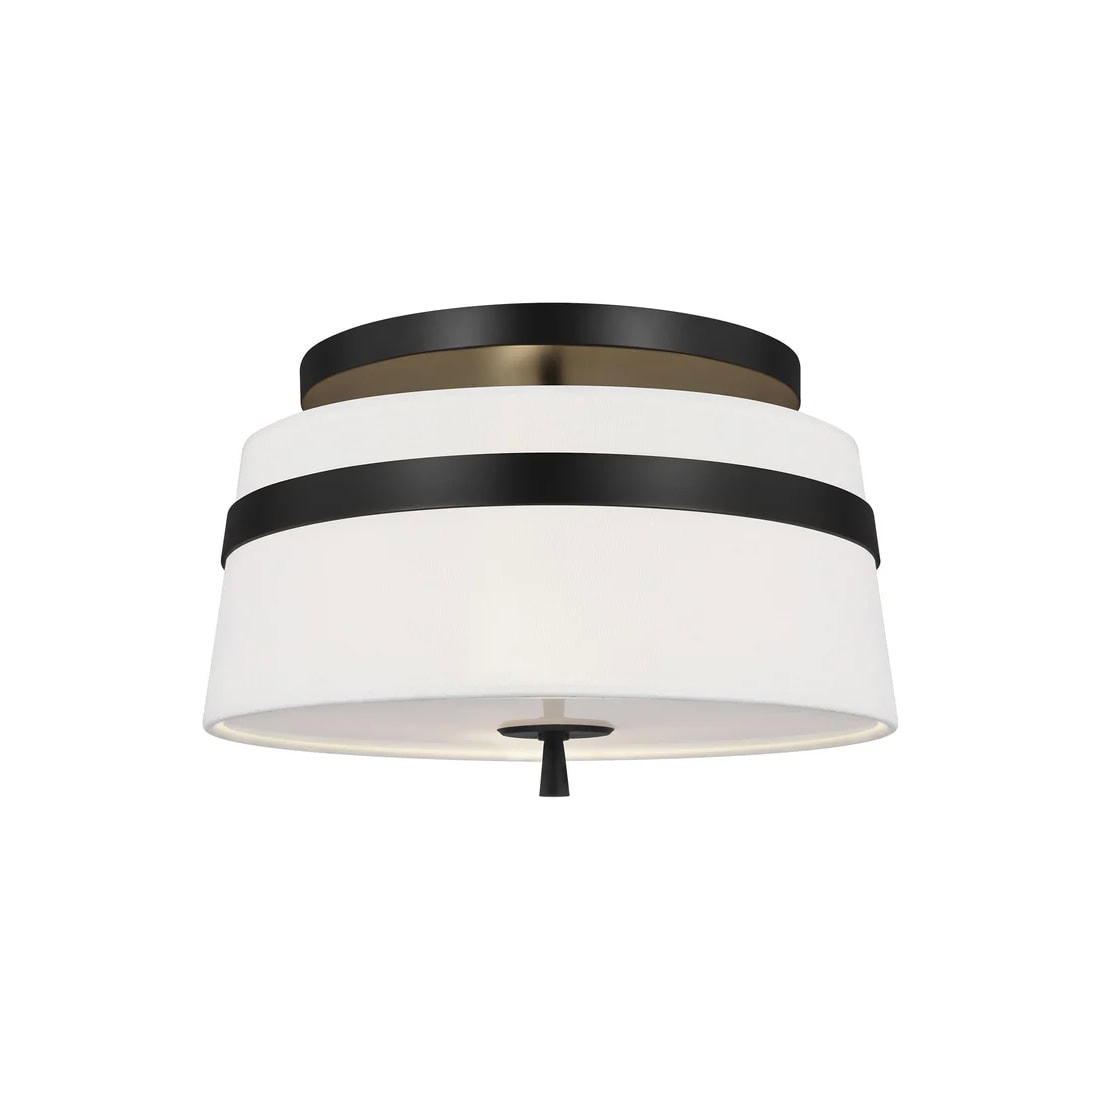
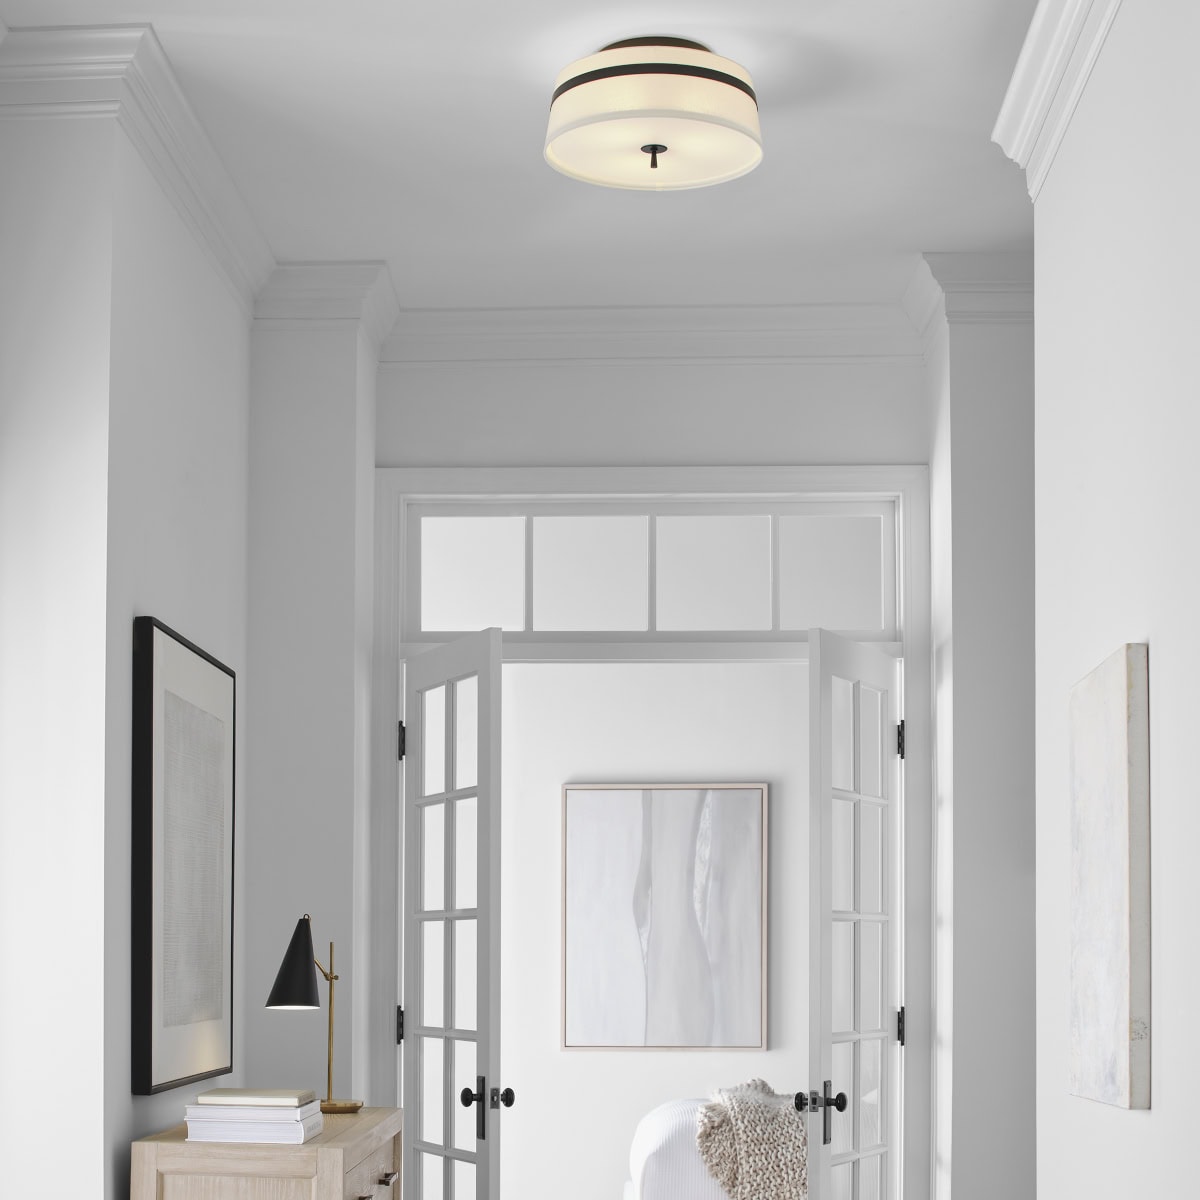
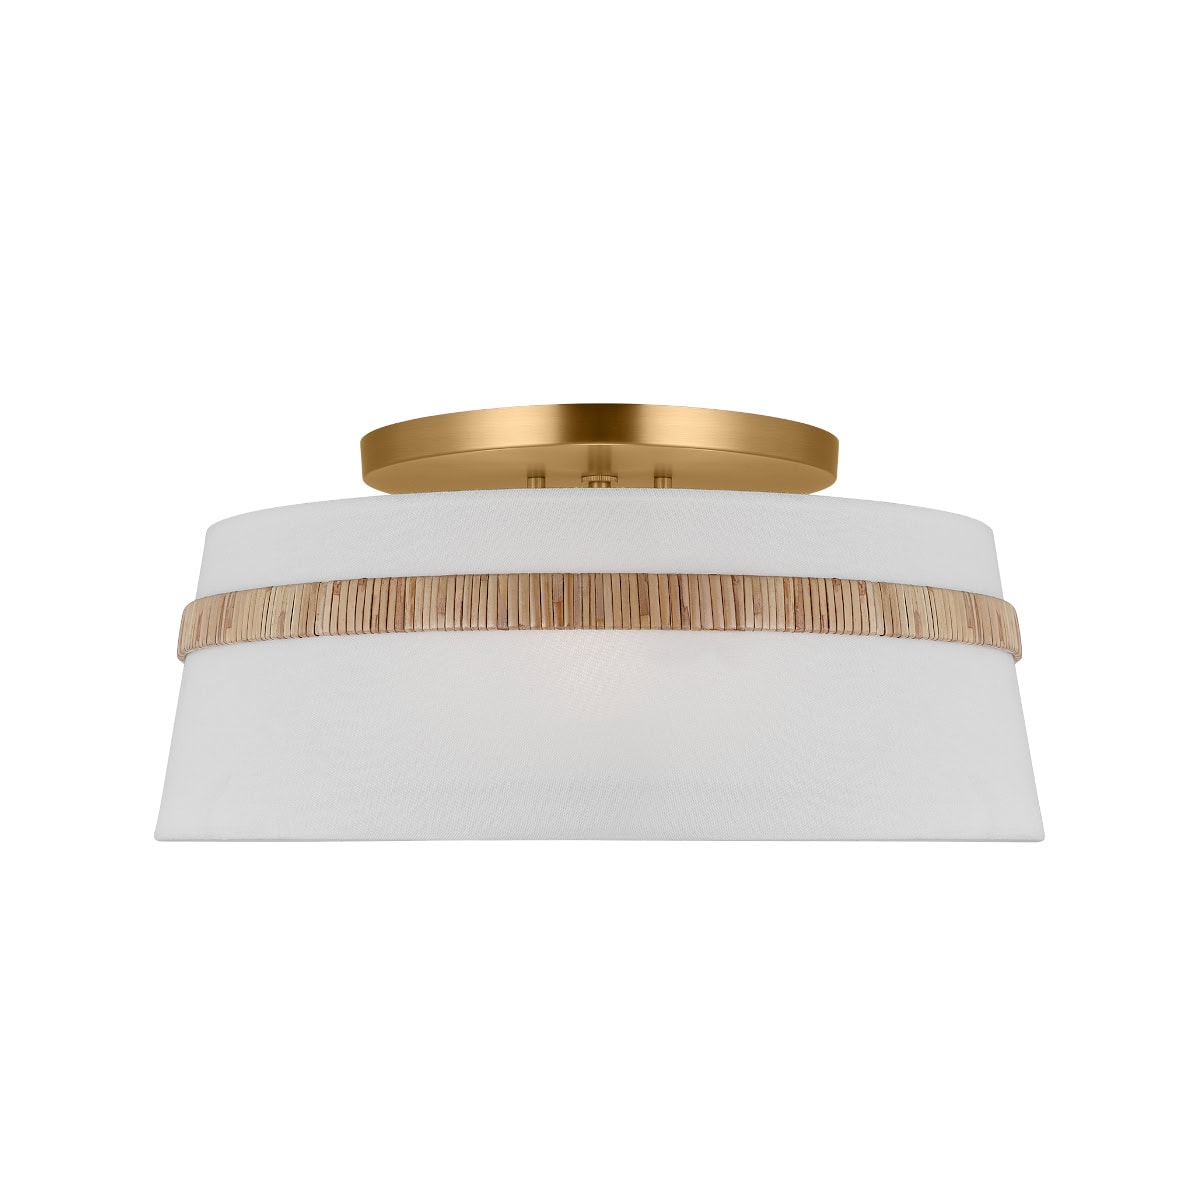
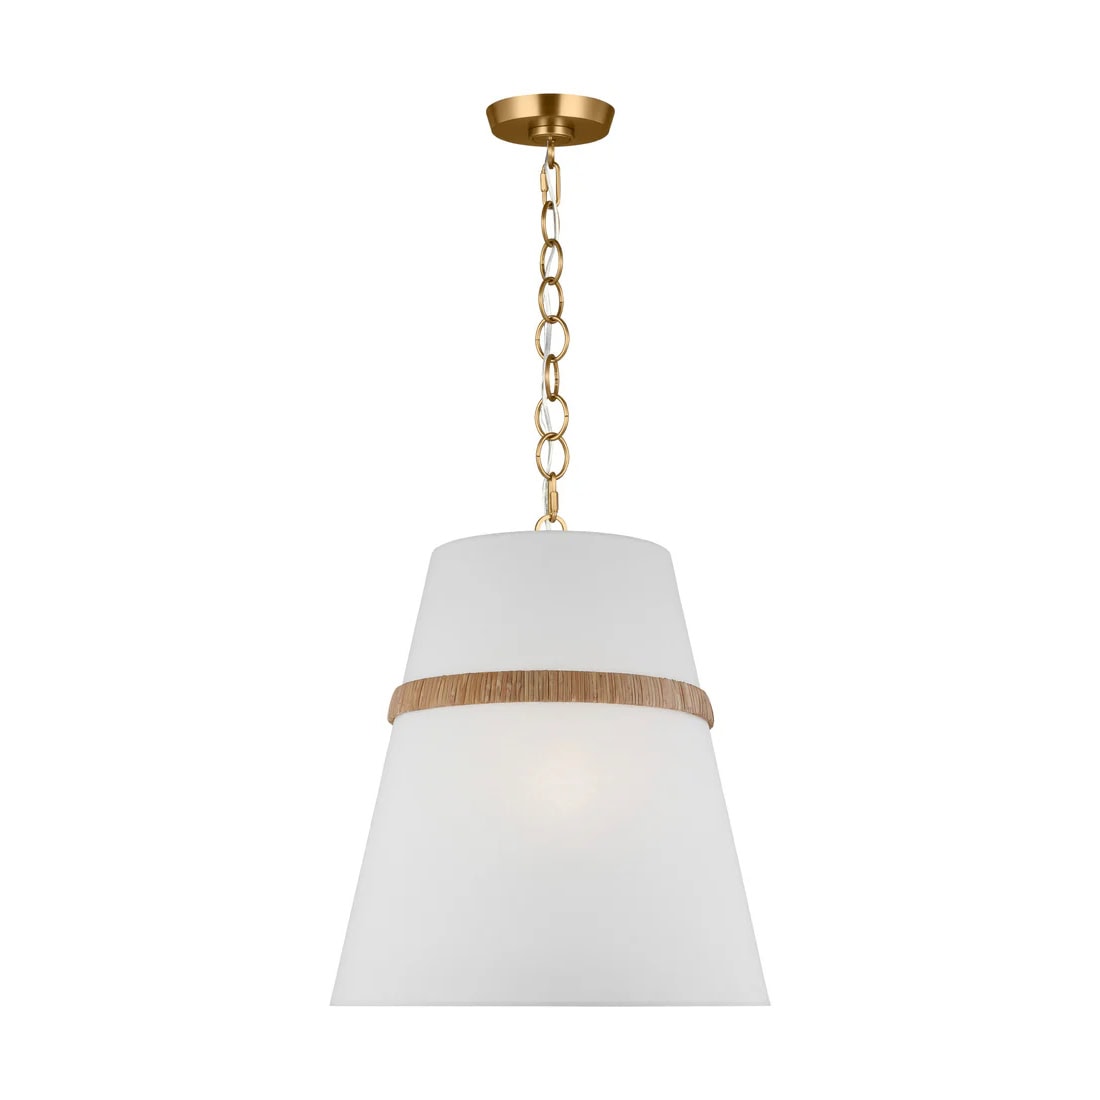
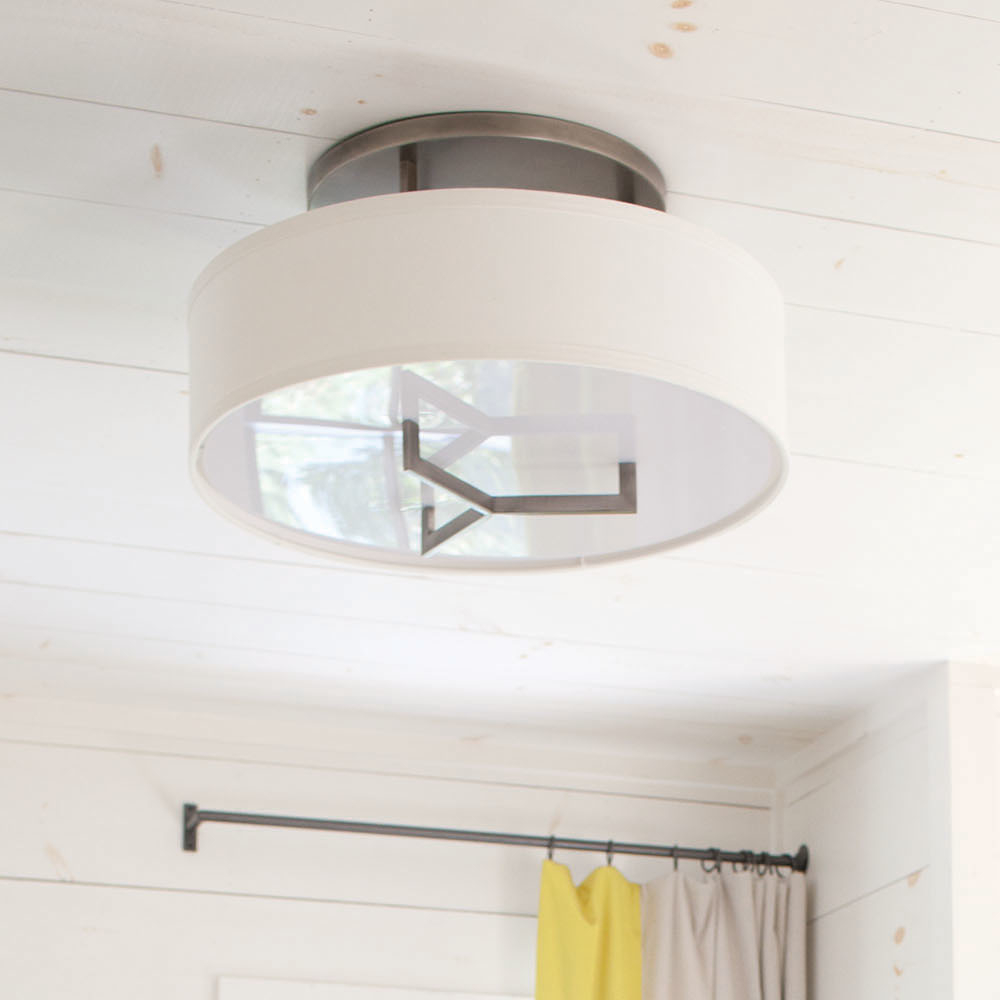
Semi-Flush Fixtures
Semi-flush pendant fixtures are designed specifically for low ceilings. These decorative fixtures have shorter dropsets, ensuring they fit well within the space without compromising style. Strategically place these above key elements such as dining tables or kitchen islands to create a focal point and add visual interest while not feeling impeding on the flow of your home.
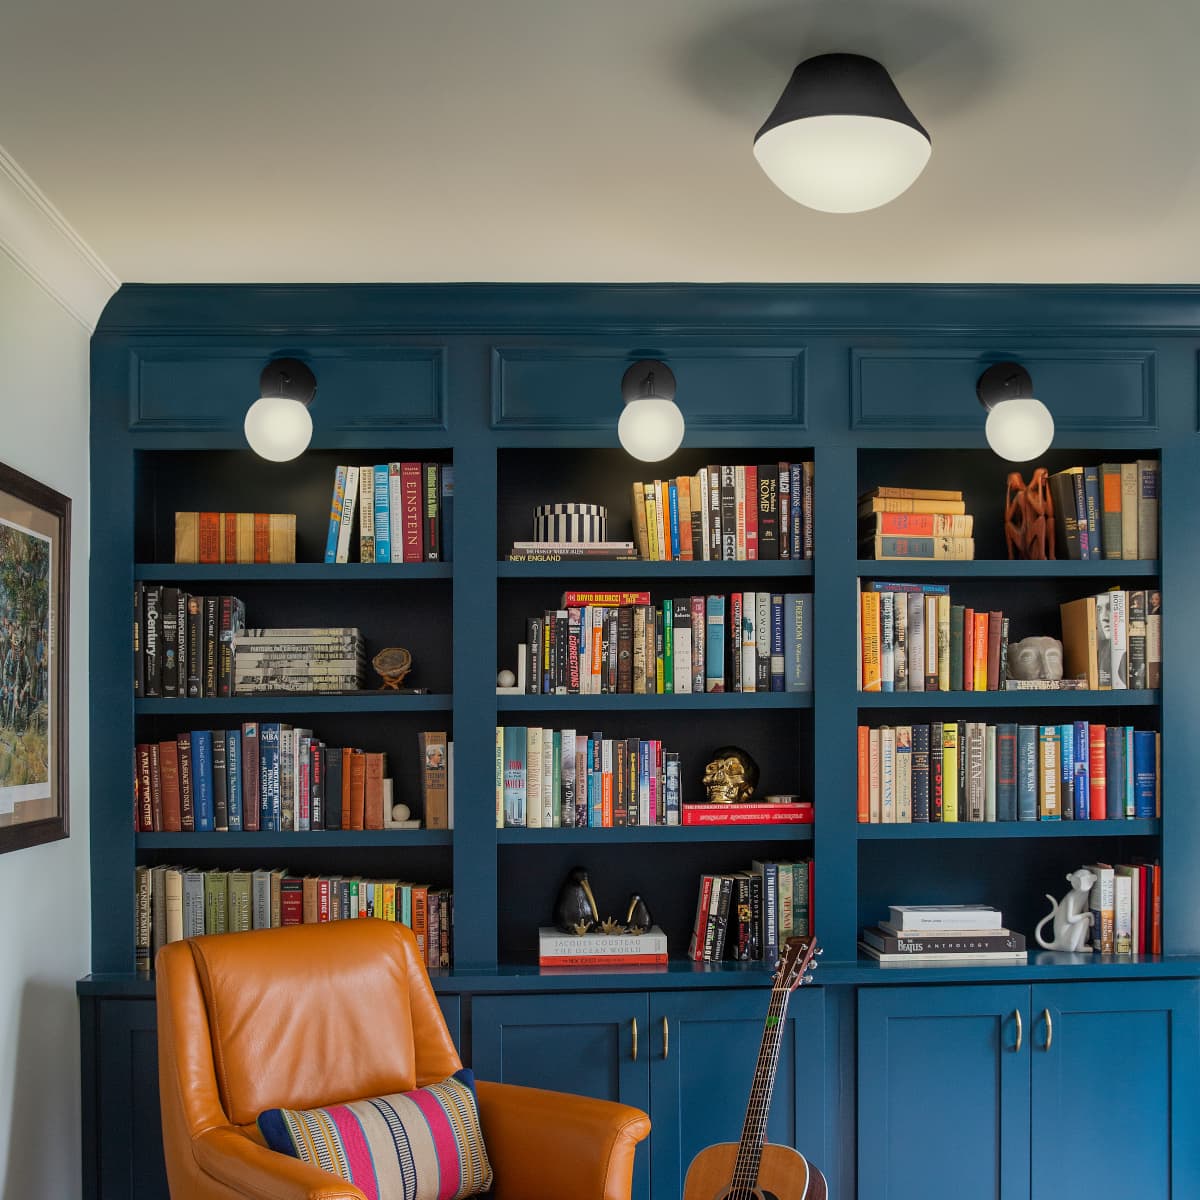
Ceiling Buttons
Ceiling buttons are luminaires designed to sit directly against the ceiling surface, providing a sleek and seamless appearance. They can serve as both functional and decorative elements in your lighting design. Simple and understated designs are well-suited for service areas like laundries and bathrooms, while decorative styles can enhance the aesthetics of living spaces. Flush mount ceiling buttons are particularly useful when recessed lighting is not feasible or desired. With a wide range of sizes, shapes, and finishes available, you can easily find flush mount ceiling buttons that align with your specific design preferences and lighting needs.
While ceiling buttons offer broad lighting coverage for the space, it’s important to consider task lights or accent lights to achieve a balanced lighting scheme. In bedroom spaces, we offer ceiling buttons that also wash light into the ceiling. When paired with a dimmer, these lights are ideal for creating a warm and relaxing atmosphere.
Track Lighting Systems
Track lighting offers flexibility and versatility in directing light precisely where it’s needed. For lower ceilings, explore recessed or surface-mounted track systems. Recessed track lighting seamlessly blends with the ceiling, creating a clean and unobtrusive look. Surface-mounted track systems add a touch of modernity and can be adjusted to illuminate specific areas or highlight artwork. These track lighting options provide an opportunity to enhance the functionality and style of the space while keeping the ceiling height in mind.
For added style check out or low voltage track systems, with a clean plastered in look these are a real talking point.
LED Strips for Recessed Ceiling and Wall Lighting
LED strips can also be incorporated into your ceilings and walls for a seamless lighting solution. LED strips are wide-angle lights that provide uniform illumination, effectively lighting up a space. By recessing these strips, you can achieve a clean and integrated look. This option is ideal for creating ambient lighting or highlighting architectural features.
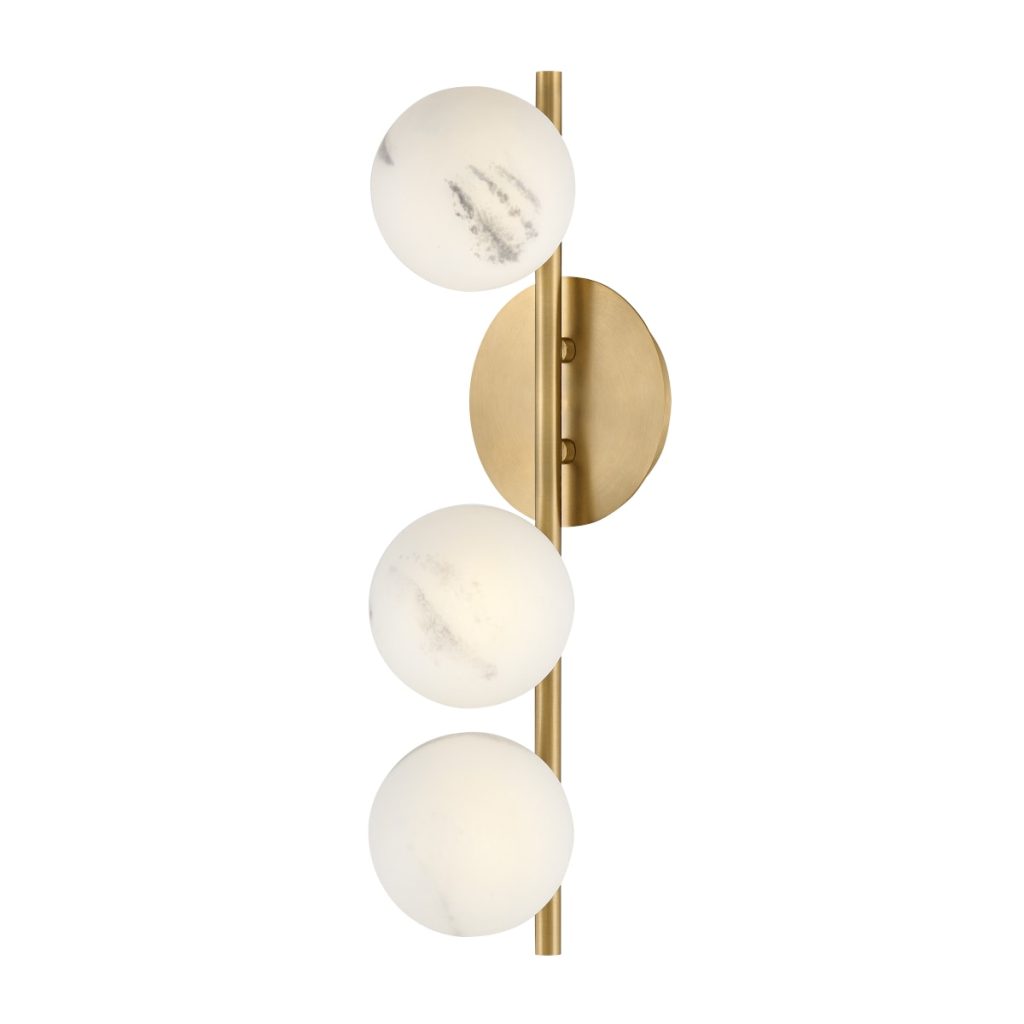
Wall Lights
Low glare wall lights that can wash light into the ceiling and wall are crucial for providing ambient lighting and creating a sense of depth in the room. These fixtures help to minimize direct glare and distribute light evenly, enhancing the overall ambiance and visual appeal of the space. Wall lights with diffusers or frosted glass shades are also effective in reducing glare and producing a soft, diffused light that gently illuminates the surroundings. By washing light onto the ceiling and wall, these fixtures create a warm and inviting atmosphere, making the room feel more spacious and visually interesting.
When selecting lighting fixtures for lower ceilings, it’s essential to consider both the functionality and aesthetics of the space. Choose wide beam or lower glare medium beam downlights based on your preference for light distribution. Opt for semi-flush pendant fixtures that fit within the lower ceiling clearance. Explore track lighting systems, whether recessed or surface-mounted, for targeted illumination. LED strips recessed into the ceilings and walls offer a seamless and wide-angle lighting option for comprehensive illumination. Low Glare Wall lights can bring ambiance and mood to a space. By carefully choosing the right fixtures, you can optimize both the lighting and visual impact in rooms with lower ceilings.
Room-by-Room Suggestions
Each room in your home requires thoughtful consideration when it comes to lighting. Let’s explore some practical advice and lighting recommendations for key areas
Living rooms
Create a warm and inviting atmosphere by combining ambient lighting, such as dimmable recessed light, recessed LED strips or ceiling lights with task lighting options like floor or table lamps. Use accent lighting such as mini downlights or spotlights to highlight artwork or architectural features.
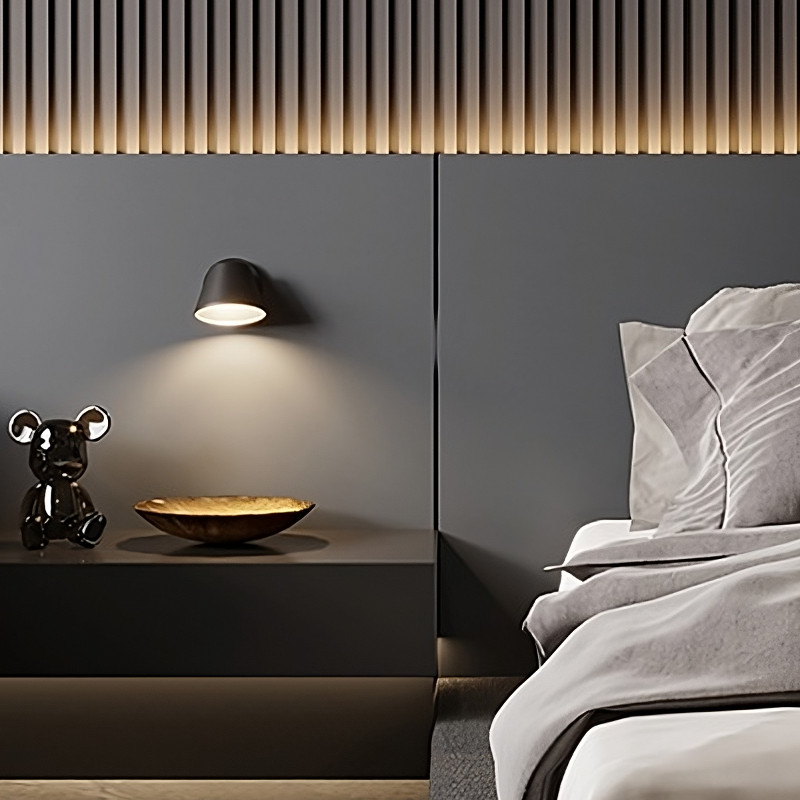
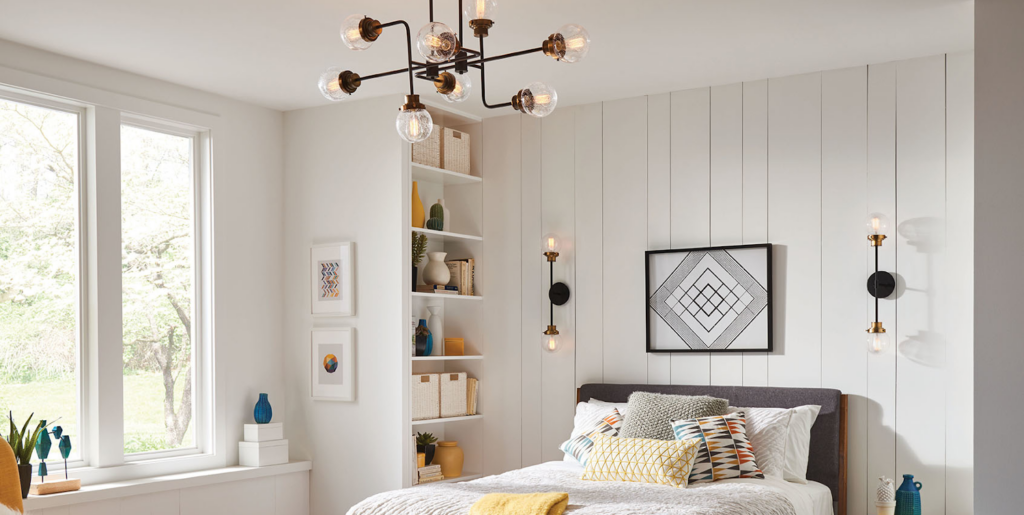
Bedrooms
Opt for adjustable wall-mounted or pendant lights on either side of the bed for convenient reading. A semi-flush fitting over the bed gives some decorative interest to the room and wide beam style downlights can be used for a clean simple layout. Install dimmers to control the lighting intensity and create a relaxing ambiance.
Kitchens
Install under-cabinet lighting to illuminate countertops and workspace areas effectively. Recessed or track lighting can provide general illumination, while pendant lights above the kitchen island add a stylish focal point.
Bathrooms
Utilize recessed LED lighting for general illumination, especially in shower areas. Add vanity lights on either side of the mirror to eliminate shadows and provide optimal lighting for grooming tasks. Where space is an issue tilting lights aimed at the mirror can provide vanity lighting.
Remember, the key is to strike a balance between functionality and aesthetics while taking into account the limitations of lower ceiling heights. By selecting appropriate lighting fixtures and considering the specific requirements of each room, you can create a well-lit, visually appealing space that feels open and welcoming. You can also take a read of our article on Light Layering for more tips on making the best use of lighting design, or get in touch if you want us to help with a professional lighting plan for your home.
Stair Lighting: The Complete Guide to Mounting Heights, Spacing, and More
Shedding Light on Safety
Factors to Consider When Purchasing Stair Lighting
Stairs are an integral part of many homes and often define the shape of your home. Stair lighting primarily serves a functional purpose, so safety should be your top priority. Look for lights that provide sufficient illumination to prevent accidents and provide clear visibility on each step. Opt for lights with appropriate brightness levels and a wide beam angle to evenly light the entire staircase.
Choosing Low-Glare Options
Glare can be a real annoyance and safety hazard. Look for stair lighting with hidden LED diodes that minimizes glare, providing a comfortable and clear view of each step. This approach ensures a well-lit staircase without any harsh lights confusing your eye and obstructing your path.
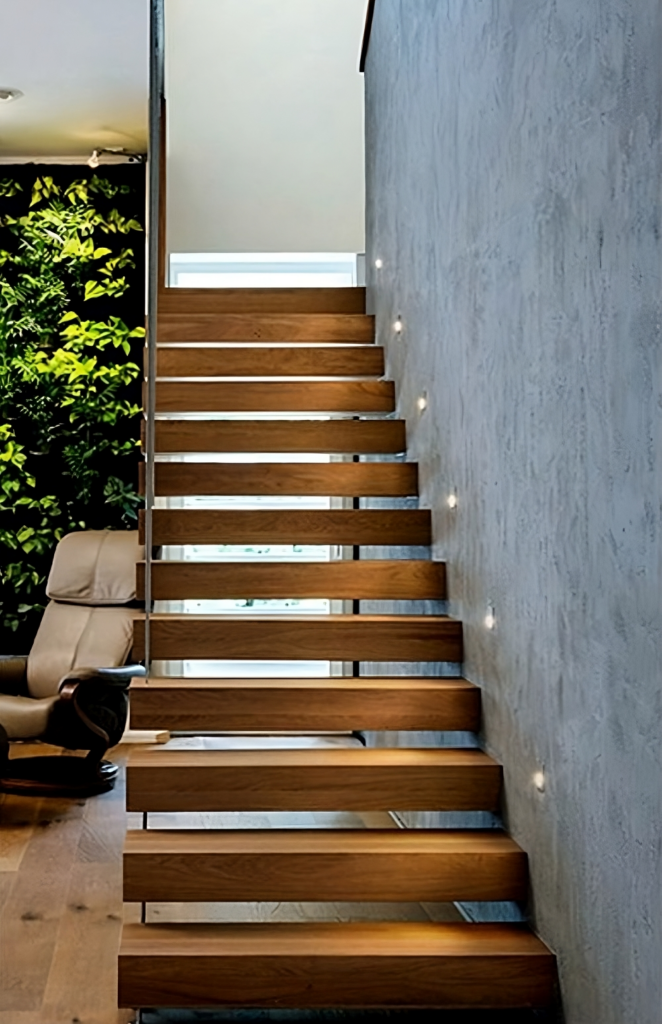
How Far Apart Should My Stair Lights Be Mounted?
Mount the first stair light above the bottom most stair and the last stair light over the top most stair, so they will also spread light onto the landing. If your stairs have a middle landing, install two stair lights, one on each wall, to light it. From there, measure between and place a stair light every third stair or roughly 300-400mm apart. If your favorite stair lights have a narrow beam, consider using more lights to give an even light by mounting them every second stair.
What Height Should I Mount My Stair Lights?
Mounting your stair lights at a height of 200mm – 300mm above the middle stairs that you are illuminating will provide an even light.
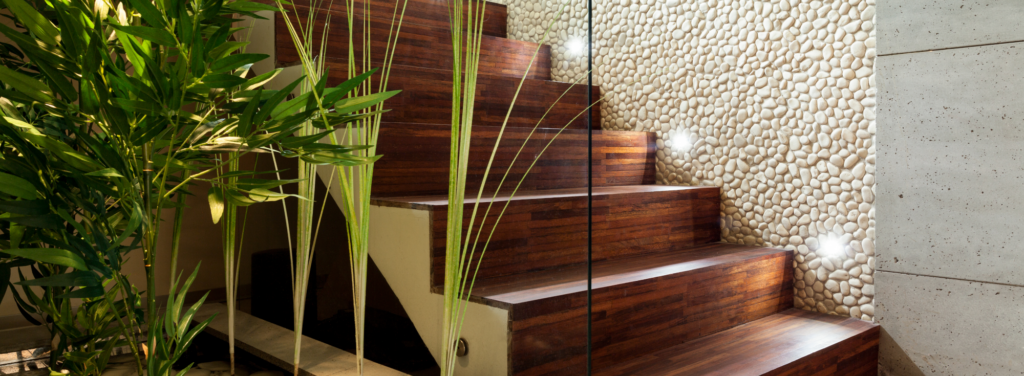
Stylish Options for Illuminating Every Step
Whether your home exudes modern minimalism or classic charm, there’s stair lighting to suit every style. Choose fixtures that seamlessly integrate with your interior design, enhancing the overall aesthetics of your staircase.
Consider whether you want to have the ability to dim or control the brightness of your stair lights. This feature can create different moods and atmospheres depending on the time of day or your personal preference. Some stair lights come with built-in dimming capabilities, while others can be integrated into smart lighting systems or a sensor, so you don’t need to wake everybody else in the house up by turning on a heap of hallway and staircase lighting.
Innovative Solutions for Hallways and Bathrooms
Remember, stair lights aren’t confined to staircases alone. They have the power to transform hallways into inviting spaces and add a touch of serenity to your bathroom oasis
Hallways—Low Glare Lighting Option with Style
Transform your hallways into welcoming spaces by installing stair lights along the walls. This low-glare option not only guides your way but also adds elegance to your corridors. This less intense option to hallway lighting can help you enjoy a warm and inviting path that ensures both safety and style. Stair lights in hallways can be placed further apart, usually every 2-3 meters. Safety isn’t as much of a concern on a flat surface, and a mixture of light and shadow looks great.
This is a great place to incorporate a smart control system or a sensor to activate the lights at night.
Bathrooms—Nightlights for Peaceful Ambiance
Create a serene atmosphere in your bathroom by incorporating stair lights as nightlights. Install them near the baseboards or vanity to provide a gentle glow for late-night trips. No more fumbling for light switches in the middle of the night!
Incorporate a dimmer on these lights to enjoy a spa-like experience or indulge in a peaceful bathing routine in the tranquil illumination of your stair lights.
LED Strips: A Functional and Stylish Alternative
Let’s explore some innovative ways to take your stair lighting to the next level. LED strip lights are versatile enough to take advantage of the nooks, crannies, and edges that are part of your stairs. This eye-catching option can transform the look and feel of your staircase.
Mounting LED Strip Lights Under the Handrail
For a sleek and modern touch, consider mounting LED strip lights under the handrail. This method not only illuminates the steps but also adds a subtle glow that highlights the architectural beauty of your staircase. It’s a subtle yet stunning way to make a statement. You can use slim LED extrusions mounted into a rebate in your handrail or make the job even easier with our custom handrail system that includes space for an LED strip and wiring.
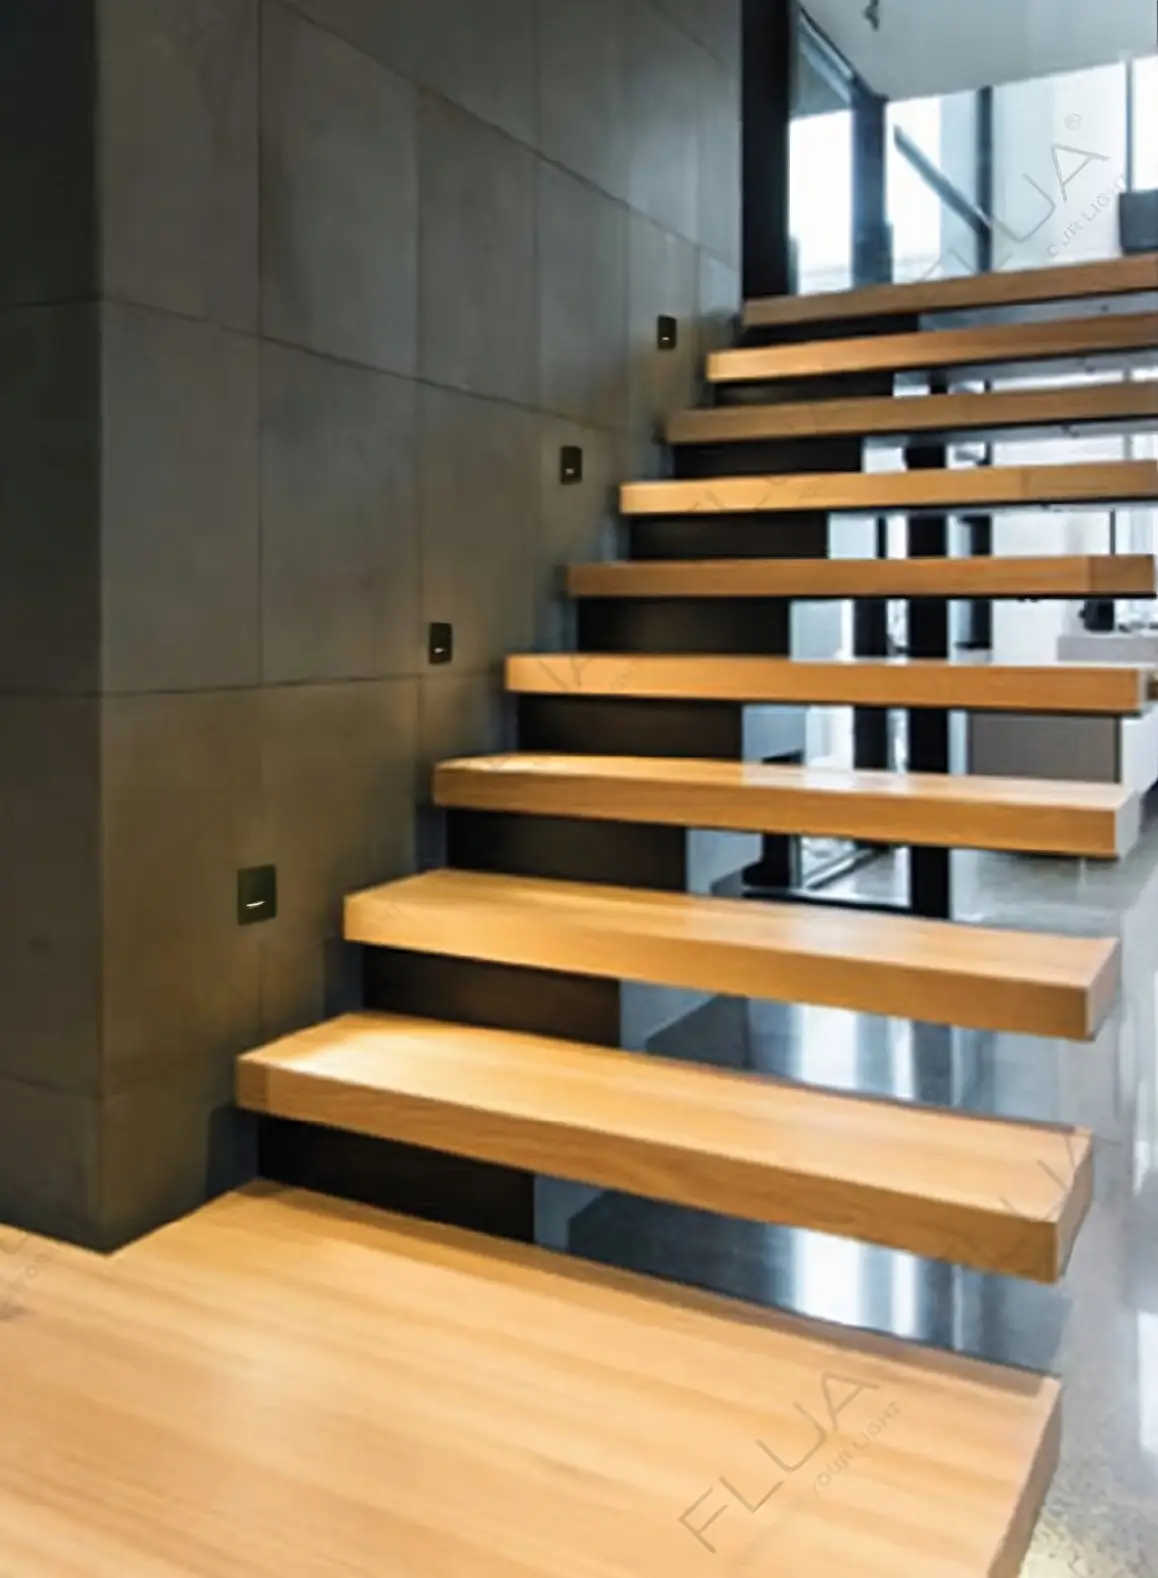
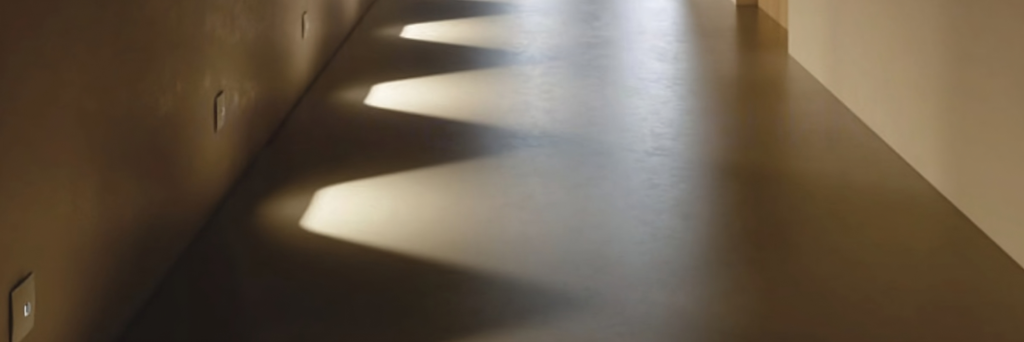
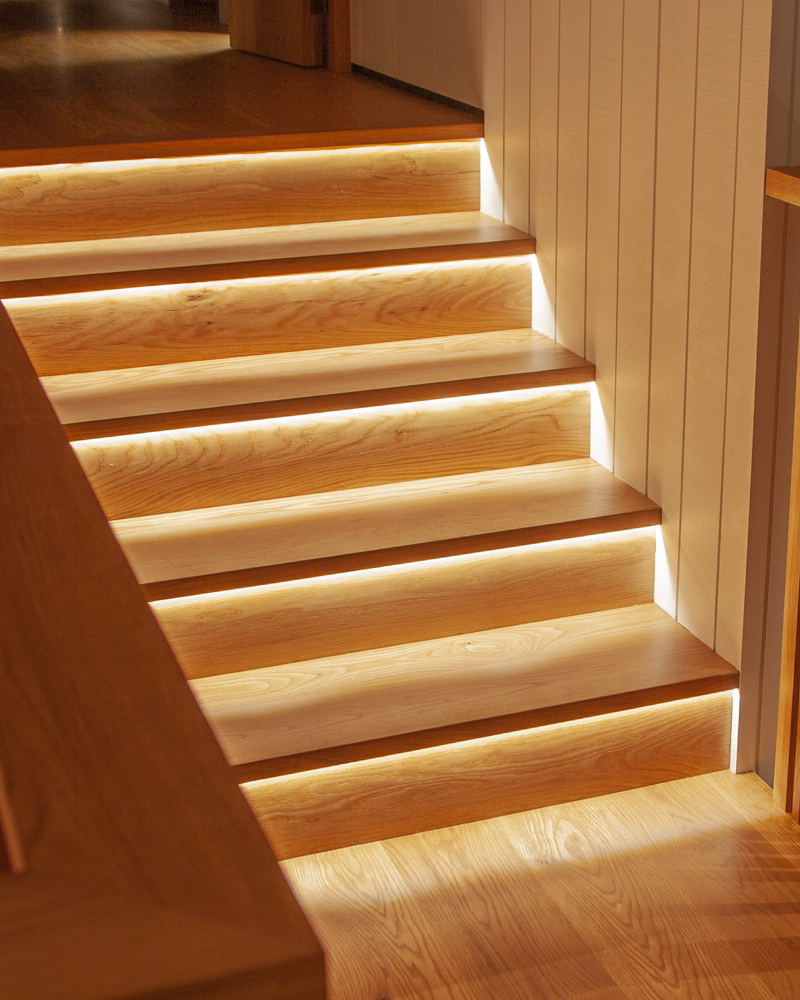
Installing LED Strip Lights Under the Lip of the Stair
Looking for a more discreet lighting solution? Installing LED strip lights under the lip of each step creates a soft and diffused glow, enhancing visibility and providing a unique look. The floating look of each stair will create a level of safety as each stair is lit, making a clear guide for using the stairs.
We have a range of slim aluminum extrusions and LED strips for this exact task. These extrusions can fit under the lip of the stair with minimal fuss and no need for an extended overhang.
-
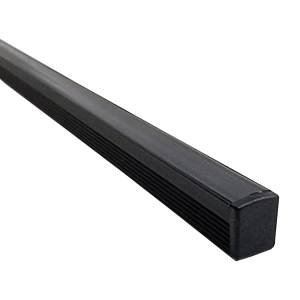 ONYX16 Slimline Black Extrusion with Black DiffuserPrice range: $20.50 through $82.00
 -
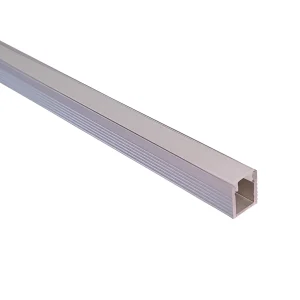 LXT06 Slimline Aluminium Extrusion with Opal DiffuserPrice range: $22.00 through $40.00
Congratulations! You now have the knowledge to select the perfect lighting for your staircases, hallways, and bathrooms. Remember, safety comes first—illuminate your stairs with low-glare options and consider proper mounting heights and spacing. Don’t forget to embrace the aesthetics and create an ambiance that reflects your unique style throughout your home.
If you have any questions or need further guidance, our team is here to assist you. Embrace the versatility of stair lights and let them illuminate your home with comfort, style, and safety!

Stair Lights
When it comes to choosing the right stair lights, safety and style are both key factors, our stair lights tick both boxes. Our selection offers low-glare options, ensuring that you and your family stay safe while also adding a touch of elegance to your home.
With energy-efficient LEDs, our stair lights not only help you save on your electricity bill but also give your home a warm and inviting ambiance that you’ll love. Whether you’re looking to create a calming atmosphere in your hallway or add a subtle night light to your bathroom, we’ve got you covered with a range of low power options to choose from.
One cool thing to note is that you can even pair our stair lights with mini sensors for easy control. Imagine walking down your stairs at night or into your bathroom and having the lights turn on automatically! Lighting Accessories – Sensors
What is Light Layering?

Here at The Lighting Centre, we use the term “light layering” to describe our approach to lighting design, but what does it actually mean? In layman’s terms, light layering is the art of using different types of light in a room to create a specific ambiance and highlight certain features. Think of it like a cake – just like how a cake needs different layers to make it delicious, a room needs different layers of light to make it inviting.
But before we dive into the different layers of lighting, let’s talk about the importance of light in general. Light is essential for human survival – it helps us see, navigate, and even regulate our circadian rhythms. But beyond the biological aspect, light also plays a huge role in how we perceive a space. The right lighting can make a room feel warm and cozy and give you options for the mood you want in your home, while the wrong lighting can make it feel cold and uninviting.
Once you understand light layers you can see the difference a professional lighting plan can make, head along to our lighting design page to start your journey with us.
Lets take a look at the Three Layers of Lighting?
Ambient Lighting
Ambient lighting is the most common type of light layering. This is the light that fills a room, providing a general level of illumination. We look to chandeliers, pendants, semi-flush (surface mounted) and recessed lighting to provide this base level of lighting.
Your ambient lighting can be the main focal point of a room but using the right low glare recessed lighting can make the ambient light disappear so the focus can be on the other lighting, or even just the architecture of the space.
Ambient lighting needs to be a general light either in the centre of the room, or multiple lights spaced evenly across the room, this will give you a balanced even light that works perfect with your other light layers.
Task Lighting
Task lighting is all about making a space functional. This type of light layering is used to provide a focused light source for activities such as reading, writing, cooking or applying makeup. Task lighting is typically brighter and more directed than ambient light. Task lighting doesn’t have to be recessed spotlights or track lighting it can also include desk and floor lamps, under cabinet lights, wall lights and even pendant lighting placed over a task space
In working rooms like Kitchens, we work hard to make sure strong task lighting is used over the bench or in the cooking and prep spaces, this could be a pendant over your island or a strip of lighting under your overhead cabinets.
Wall mounted lighting is often used in task lighting. These would be the permanent fixtures that are created next to beds or chairs to be used as reading lamps. A good task lighting layer can give you options for the mood of a space, once the ambient lighting is turned off a home is dark and moody with just specific areas lit, it is lovely to read a good book on the couch or in bed in a dark atmosphere.
Accent Lighting
Last but not least is accent lighting. This type of light is used to highlight specific features in a room, such as artwork, architectural elements, or even plants. Accent lighting is typically the brightest of the three types and can come from sources such as spotlights or track lighting. Examples of lights that can create accent lighting include spotlights, track lighting, and even picture lights.
Track lighting is rows of lighting that are usually adjustable so their lights can go exactly where you want them to. This gives theatre/stage lighting vibes.
Picture lights are the lights that are used in museums to highlight pictures. These lights can be used to accent something below the light such as a plant or a thing of pottery. We have a wide selection of wall mounted and recessed options for art lighting.
Highlighting the architecture can involve lights to wash a vaulted ceiling, or even mini recessed lights to wash up or down pillars in the home. This is a great way to add some visual interest to a space and highlight the unique elements of your home. Shelves and bookcases also look great with an added LED strip or recessed cabinet light.
We also consider your background lighting to be accent lighting, consider having indirect wall lights in relaxing spaces that wash lighting onto a wall without harsh glare, this could be a mood setting wall wash in your bedroom or and background lighting in the lounge for movie time.
One of the perks of a good layer of accent lighting is this is a perfect set of lights to keep on at night to really enjoy the moodiness of a home at night. It is easy to overlook but the accent lighting can really bring your lighting to the next level.
Bringing it all together
Now, you may be thinking, “But wait, can’t I just use one type of light? Why do I need all three?” The short answer is, you don’t have to use all three types of light in every room but using a combination of them can create a more dynamic and interesting space. For example, ambient light alone can make a room feel flat, but by adding task and accent lighting, you can create depth and interest.
Here are a few tips to help you achieve the perfect ambiance in a room:
- Start with ambient lighting: Ambient lighting should be the foundation of your light layering. It provides a general level of illumination and sets the overall tone of the room. Use a combination of ceiling lights, such as chandeliers, pendants, and recessed lights, to evenly distribute ambient light throughout the space.
- Add task lighting: Once you have established the ambient lighting, it’s time to add task lighting. Use a combination of dedicated lights to provide lighting for specific activities.
- Use accent lighting to highlight features: Use spotlights, track lighting, and picture lights to draw attention to these features and create a sense of depth and interest in the space.
- Dimmer switches can be used to control the intensity of the light in a room, which can help you create different moods and ambiances. Use dimmer switches to control the ambient, task and accent lighting, and experiment with different lighting levels to find the perfect balance for your space.
- Layer the lights: Be mindful of the layers of light in a room. Use a combination of lights at different heights, angles and brightness to create depth and interest in the space.
- Adjust the lights to the room’s purpose: The purpose of the room will also affect the balance of lights. For example, in a bedroom, you may want to have a lower level of ambient light and higher levels of task lighting for reading, while in a living room, you may want to have a higher level of ambient light and lower levels of task lighting.
- Consider the colour of the light: The colour of the light can also affect the ambiance of a room. Warmer colours, such as yellow and orange, create a cozy and inviting atmosphere, while cooler colours, such as blue and white, create a more modern and clinical feel.
Remember to always keep in mind the room’s purpose and personal preferences when layering your lights.
When it comes to light layering, the key is to strike the perfect balance between ambient, task, and accent lighting. While it may seem like a simple task, it can be challenging to achieve the perfect ambiance in a room. That’s why at The Lighting Centre, we offer professional lighting design services to help you create the perfect ambiance in your home. Our team of experts will work with you to understand your needs and preferences and create a custom lighting plan that will enhance the beauty and functionality of your space.
From selecting the right fixtures to positioning lights in the right places, we’ll handle every aspect of the process. With our help, you can enjoy a beautifully lit home that will make you feel comfortable and relaxed.
Don’t settle for less when it comes to your home’s lighting. Book a lighting plan here and let us help you achieve the perfect ambiance.
Mariner Landscape Range
Professional DIY Garden Lighting System
Every now and again we come across a range of fittings that deserves to be given extra attention and explanation. This collection of garden lights and accessories features some extraordinary benefits that make it perfect for both professional installations and DIY customers looking for a premium solution.
It is the quick connect system that stands out at first. These sealed plug and play connectors, junctions and drivers make the installation simple, and as the range is 24VDC (Extra Low Voltage) also very safe to use without elaborate precautions.
Added to this the whole collection is made of coastal grade materials that are backed with a 5 year warranty. The fixtures are all available in Solid Copper, 316 Stainless Steel and Sand Black powdercoated over 316 Stainless Steel. The range of fixtures is diverse and allows for a multitude of effects and applications and can be used across the entirety of a project without needing to introduce alternative ranges.
First, we will delve into the range of fixtures and their applications then this article will cover the quick connect system and drivers used to power the system with helpful diagrams as a complete guide for your garden lighting.
Spotlights
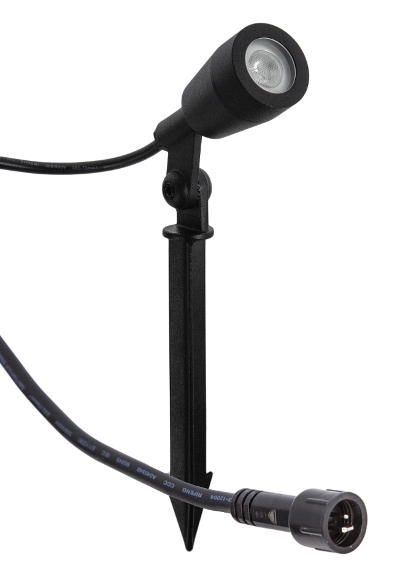
Mini Spot 4W – Spike and Surface Mount
A simple spot supplied with spike and surface mount base for lighting small trees, bushes, statues and over features in your garden. Supplied with Quick Connect Cable, Surface Mount and Spike Mount
| Lamp: LED 4W – 216 lumens Beam Angle: 25 Degrees Spot Diameter: 41mm Length: 97mm IP Rating: IP67 Inrush Current: 0.28A |
Spot 7W – Spike and Surface Mount
Standard use adjustable spotlight supplied with both spike and surface mounted base, perfect for larger trees. Supplied with Quick Connect Cable, Surface Mount and Spike Mount
| Lamp: LED 7W – 470 lumens Beam Angle: 45 Degrees Spot Diameter: 56mm Length: 122mm IP Rating: IP67 Inrush Current: 0.47A |
Glare Guard Accessory
Anti-glare hoods are available for both sizes of spotlight and work with spike and telescopic pole lights. These can be added to the light after installation.
Mini Pole Lights
Mini Single Pole Spot 4W
Small scale adjustable spotlight on telescopic pole to elevate light source, great for smaller trees and features. Supplied with Quick Connect Cable and Mounting Spike
| Lamp: LED 4W – 216 lumens Beam Angle: 25 Degrees Spot Diameter: 41mm Height: Telescopic 200-350mm IP Rating: IP67 Inrush Current: 0.32A |
Mini Twin Pole Spot 2 x 4W
Twin adjustable spotlights on a telescopic pole to elevate light source, great for uplighting smaller trees and features. Supplied with Quick Connect Cable and Mounting Spike
| Lamp: LED 2 x 4W – 2 x 216 lm Beam Angle: 25 Degrees Spot Diameter: 41mm Height: Telescopic 200-350mm IP Rating: IP67 Inrush Current: 0.52A |
Pole Lights
Single Pole Spot 7W
Adjustable spotlight on telescopic pole to elevate light source, great for larger trees and features as well as downlighting paths and driveways. Supplied with Quick Connect Cable and Mounting Spike
| Lamp: LED 7W – 470 lumens Beam Angle: 45 Degrees Spot Diameter: 56mm Height: Telescopic 480-880mm IP Rating: IP65 Inrush Current: 0.61A |
Twin Pole Spot 2 x 7W
Twin adjustable spotlights on a telescopic pole to elevate light source, great for larger trees and features as well as downlighting paths and driveways. Supplied with Quick Connect Cable and Mounting Spike
| Lamp: LED 2 x 7W – 2 x 470 lm Beam Angle: 45 Degrees Spot Diameter: 56mm Height: Telescopic 480-880mm IP Rating: IP65 Inrush Current: 1.2A |
Spread Lights
Mini Spreadlight 4W
Mini Spreadlight on a Telescpoic Pole, an indirect light that is perfect for lighting low level planting and washing light across grass and pathway spaces. Supplied with Quick Connect Cable and Spike.
| Lamp: LED 3W – 60 lumens Hat Diameter: 110mm Height: Telescopic 485-885mm IP Rating: IP65 Inrush Current: 0.33A |
Spreadlight 5W
Spreadlight on a Telescpoic Pole, an indirect light that is perfect for lighting low level planting and washing light across grass and pathway spaces. Supplied with Quick Connect Cable and Spike.
| Lamp: LED 5W – 80 lumens Hat Diameter: 200mm Height: Telescopic 517-917mm IP Rating: IP65 Inrush Current: 0.51A |
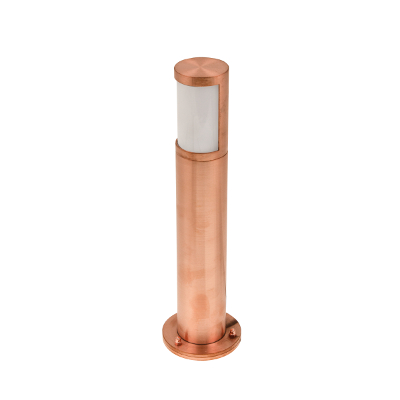
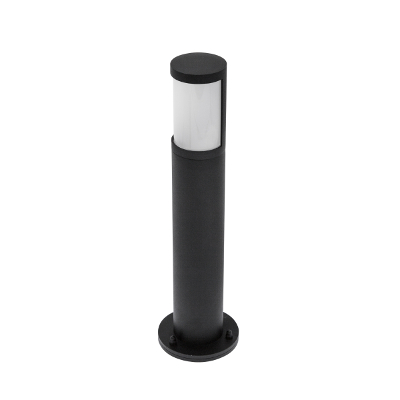
Bollards
Bollard 360° – Spike and Surface Mount
360mm High Bollard for general illumination for garden, path and driveway lighting. Supplied with Quick Connect Cable, Flange for Surface Mount and Spike for In-Garden Mount.
| Lamp: LED 7W – 310 lumens Diameter: 60mm Height: 360mm IP Rating: IP65 Inrush Current: 0.66 |
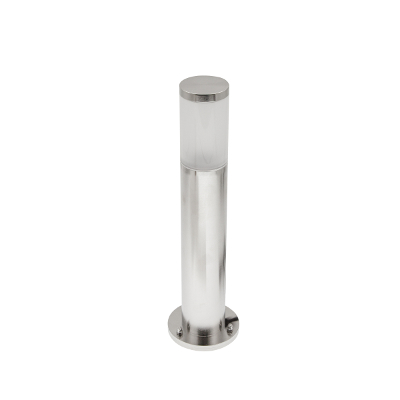
316 Stainless Steel
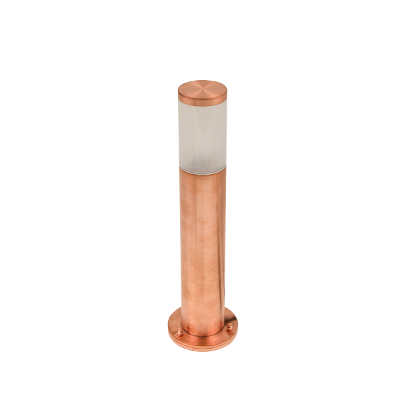
Solid Copper
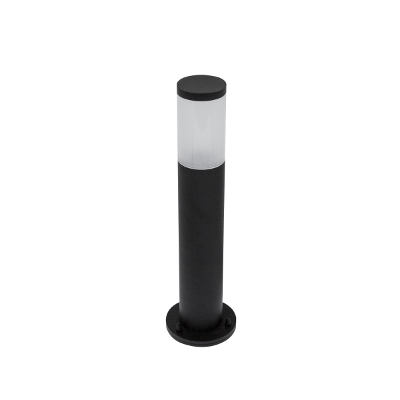
Sand Black
Bollard 200° – Spike and Surface Mount
Bollard with a rear cut off, the light can only shine in 200 Degrees to the front of the light. for general illumination for garden, path and driveway lighting. Supplied with Quick Connect Cable, Flange for Surface Mount and Spike for In-Garden Mount.
| Lamp: LED 7W – 220 lumens Diameter: 60mm Height: 360mm IP Rating: IP65 Inrush Current: 0.66 |

316 Stainless Steel
Solid Copper
Sand Black
Drivers
As the Mariner range is 24VDC a Constant Voltage Driver is required to convert mains voltage (230V) into the required low voltage. It is important to note that as the lighting circuit is low voltage it doesn’t require extra safety precautions and the cabling can be run above ground without conduit or extra shielding.
Drivers are available as either hard-wired or pre-fitted with a 3-Pin Plug to simply plug into a convenient power outlet. The drivers are IP67 rated meaning that are suitable for use in exterior locations and are rated to be exposed to the elements. Never bury the driver directly.
How to select the correct driver
Selecting the driver required is straightforward, one driver will be required for each circuit of fittings. To select an appropriate driver requires you to be aware of the Current requirement of the fittings.
Do not select a driver based on the wattage of the light fixtures. When first turned on the LEDs will draw a higher current (referred to as Inrush Current) and it is essential the driver is large enough to cope with this.
Simply add the values of Inrush Current for each fixture on the circuit and select a driver with a higher Amperage value than this total.
For example:
A circuit will consist of 3 Mini Spikes in a garden bed and
1 Telescopic Spotlight lighting a larger tree at the end of the garden
3 x Mini Spike @ 0.28A ea = 3 x 0.28A = 0.84A
1 x Single Pole Spotlight @ 0.61A
= 0.84A + 0.61A = 1.45A Total
Cross reference the driver chart and we select a 40W Driver with a 1.67A capacity
Tips for selecting and using LED Drivers
- Locate driver as close to fixtures as practical to minimise run lengths
- Locate driver as centrally as possible in larger installs
- Conceal drivers behind plants or landscape features, under decking or within sheds
- If the circuit is longer than 50m or the Amperage is within 5% of maximum amperage select the next highest available driver. If this is not possible split the circuits up
- If lights are flashing or strobing this indicates the driver is not of sufficient capacity
- If a circuit is of significant length or involves a large amount of fixtures please consult us or a registered electrician
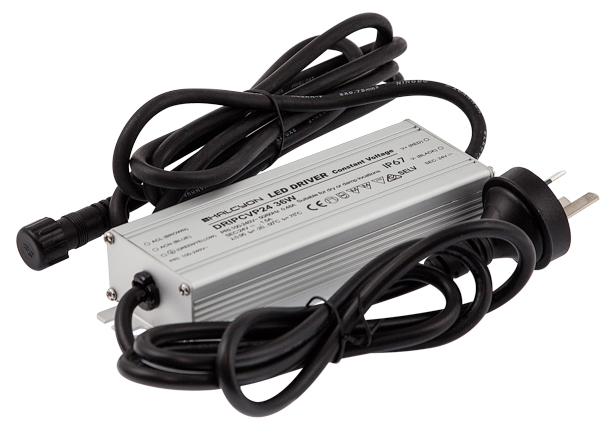
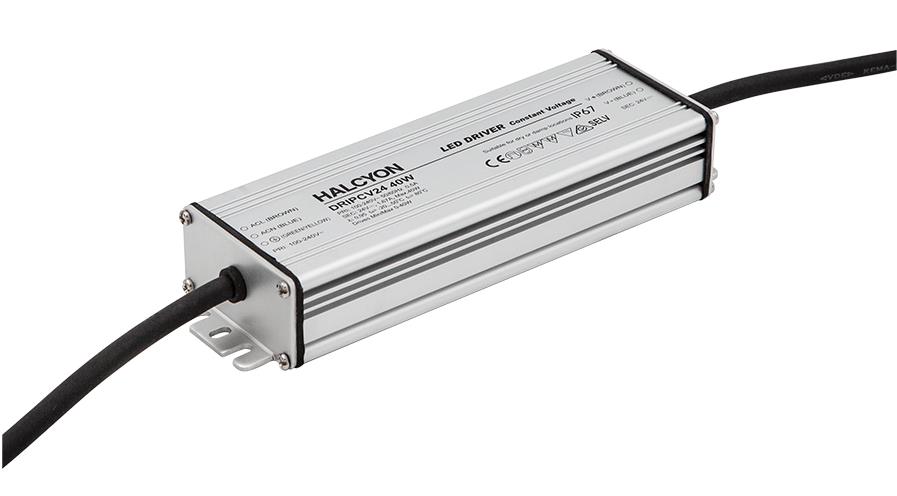
What Drivers are Available
Drivers are available in two types – plugged and hard-wired.
All of these drivers are exterior grade (IP67).
Plugged types have a 3-Pin Plug on the Primary side and a Quick-Connector on the Secondary making them perfect for a DIY install.
Hard-wired drivers are available in higher wattages and do not have either a 3-Pin or Quick-Connect Plug. These are readily adaptable to work with a Quick-Connect system on the secondary side via use of a Quick-Connect Feed Cable or a 2-Way IP68 Junction. However a registered electrician is recommended to connect these drivers to a 230V supply (either 3-Pin plug or hardwire).
Click on the specs for the driver you need to be taken to the product page
Plugged Driver – IP67 Rating
| Input Voltage | Max Ouput | Output Current | |
| 24V 75W | 240V | 75W | 0-3.15A |
Hard Wired Drivers – IP67 Rating
| Input Voltage | Max Ouput | Output Current | |
| 24V 40W | 240V | 40W | 0-1.67A |
| 24V 75W | 240V | 75W | 0-3.15A |
| 24V 150W | 240V | 150W | 0-6.25A |
| 24V 200W | 240V | 200W | 0-8.34A |
| 24V 320W | 240V | 320W | 0-13.33A |
Connectors and Extensions
A full range of connectors, sockets and extensions are available for the Quick-Connect system. Additionally there are IP68 Junctions available that can be used to quickly and easily adapt cabling and non-Quick-Connect fixtures into the system. These are simple way to complete a cable join preventing the need to solder and heat-shrink.
Feed Cables
Extension Cables
Sockets
Junctions And Cable
Junctions are glanded IP68 cable junctions with screw terminals inside and a great way to further extend a system with either 24V fixtures outside the Quick-Connect range (for example ingrounds, more powerful uplights, deck lights and pond lights). These junctions require very little specialist tools (appropriate spanners and a small slotted screwdriver should suffice) to use.
Ensure you maintain cable colour polarity when making these joins.
Loose cable is of use with Junctions and to extend cable runs longer in situation that would be Impractical with Quick-Connect Extensions. Be aware in certain in some scenarios a Quick-Connect may be required to be removed and have cables spliced, or use an additional Quick-Connect Feed Cable
Junctions
IP68 Cable Junctions with Screw Terminals
2-Way Junction

3-Way Junction
Cable
Cable type is H07RN-F 2×1.5mm Round Double-Insulated cable (Brown/Blue)

Download A Example PDF using the Mariner Landscape system
Download the full PDF Catalog with Example
(large file)
What are lumens?
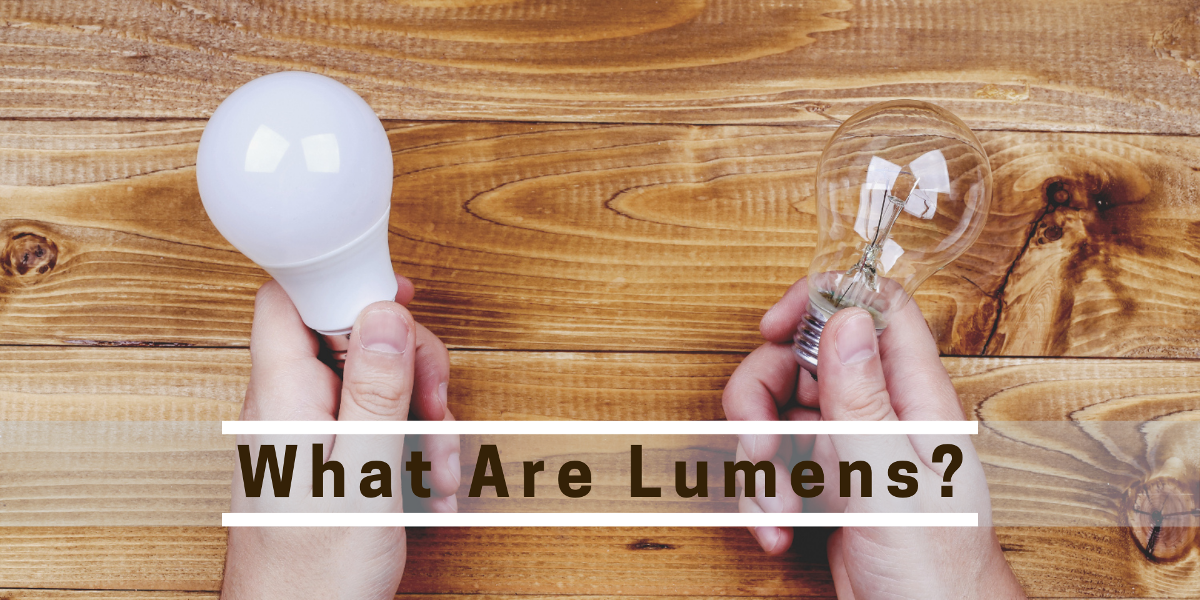
Simply put, Lumens are a measurement of light output, more lumens = more light. Lumens (lm) are helpful to determine how bright your light is, Watts (W) are useful to determine how much power the light will consume. If you are replacing old lamps with new LED lamps and you still don’t know how many lumens you need, well, you’ll be glad you found this page, we have a chart below that shows the relative light output of old-style GLS and Halogen lamps so you can make sure your new LED is consistent.
How Many Lumens is a Standard GLS Lamp
| Wattage | Approx Lumens | Efficiency |
| 25W | 250 lm | 10 lm/w |
| 40W | 450 lm | 11 lm/w |
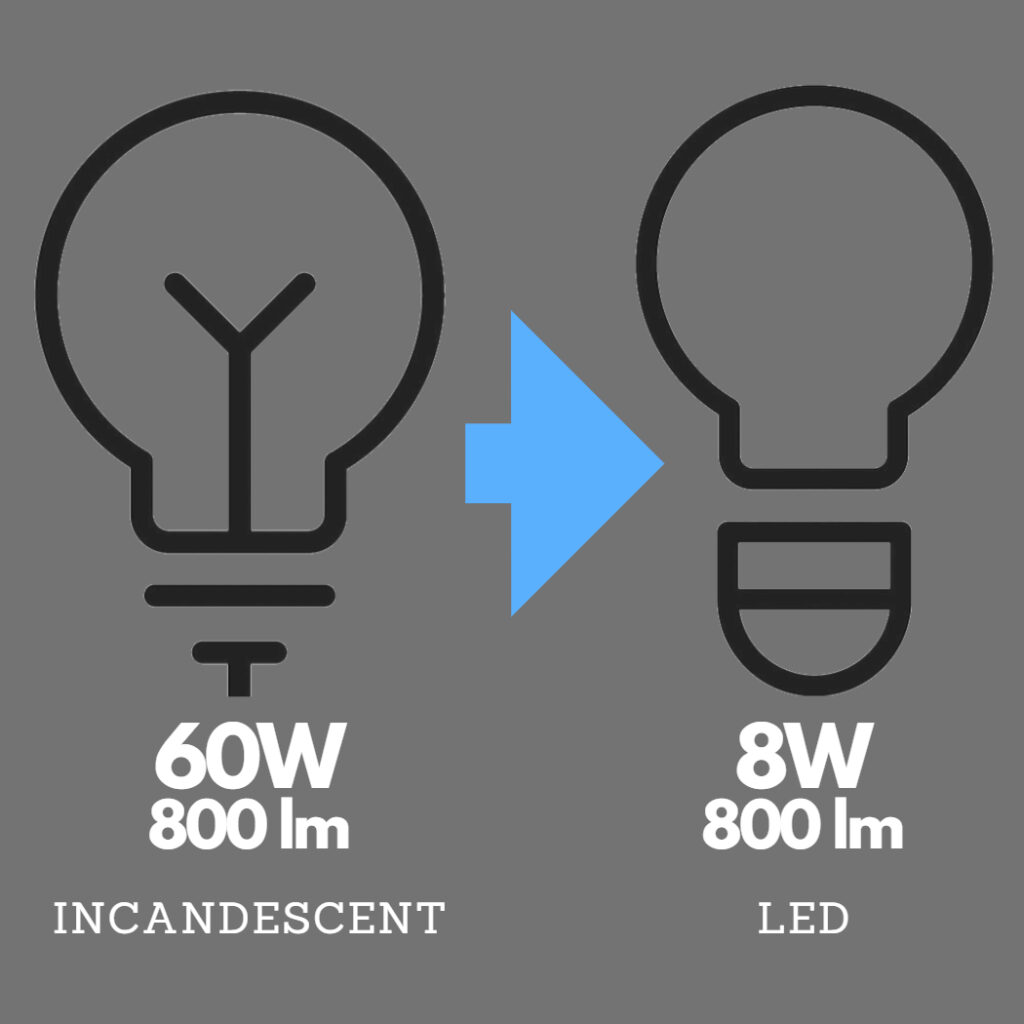
| 60W | 800 lm | 13 lm/w |
| 75W | 1000 lm | 13 lm/w |
| 100W | 1500 lm | 15 lm/w |
| 150W | 2250 lm | 15 lm/w |
| 200W | 2800 lm | 14 lm/w |
How Many Lumens is a Halogen lamp
| Power Input | Approx Lumens |
| 12V 20W | 180-250 lm |
| 12V 35W | 400-550 lm |
| 12V 50W | 550-770 lm |
| 230V 50W | 300-400 lm |
Why we don’t use Watts to determine the light output for LED’s
Whilst it may seem reasonable, as often you can find a correlation between Watts and Lumens with LED lamps, however as technology has progressed light outputs relative to wattage can vary vastly between some brands or generations of lamp. Using Lumens is the best way to make sure the amount of light output is consistent across a space.
We used to have 9 or 10W LEDs with an output of 400 lumens now some 10W LED’s are getting up to 1000 lumens.
In our store we normally look at the lumens first to measure the light output and the wattage second to see how efficient the lamp or fixture is.
Are more lumens better?
This is tricky to answer because it comes down to the situation, you are trying to find the right level of light for you and the space. If you currently use a 60W lamp (~800 lumens) but you want a brighter light you could try using a 1000 lumen LED lamp in the same fitting. The only issue is that LED lamps have more glare than normal lights.
A 75W 1000 lumen light bulb is fine to have in your vision but a 1000 lumen LED can be quite sharp on the eyes and can cause discomfort. We always recommend swapping like for like unless the light source is hidden inside a light fitting and cant be easily seen.
We often get asked about fittings that are inadequate for the task, for instance, you could have a light fitting with a single bulb lighting your whole dining room space. This really is a situation where finding the highest power LED lamp could let you down, as it won’t light the space nicely and glare will be an issue. It would be best to upgrade to a fitting or fittings that are more adequate for the room.
What about the colour of the light
Colour of light can affect the light output with LED, generally speaking, you will find cooler colours of LED have a higher lumen value, this is because the LED diode inside the LED light is blue in colour, so to create cooler, bluer lights the manufacturer can use fewer phosphors to change the colour of the light.
There is a perception difference too if you use a 1000 lumen 3000k (warm white) LED and swap it to a 1000 lumen 6000k (daylight) LED you will perceive the second lamp is brighter. It’s not generating more light but your eye feels it is a better working light.
Colour of light is determined by the Kelvin (K) of the lamp, here is a quick chart to sum up the colours but lower numbers are warmer and higher numbers are cooler. This is a very general guide for what spaces to use these lamps in, feel free to break these rules.
| Colour Temperature | Colour | Space used |
| 1800k | Ultra Warm | Decorative Lamps |
| 2700k | Extra Warm White | Bedrooms, Living Spaces |
| 3000k | Warm White | Bedrooms, Living Spaces, Bathrooms, Kitchens |
| 4000k | Cool White | Kitchens, Bathrooms, Office, Garage or Retail |
| 5000k – 6000k | Daylight | Commercial, Retail or Office |
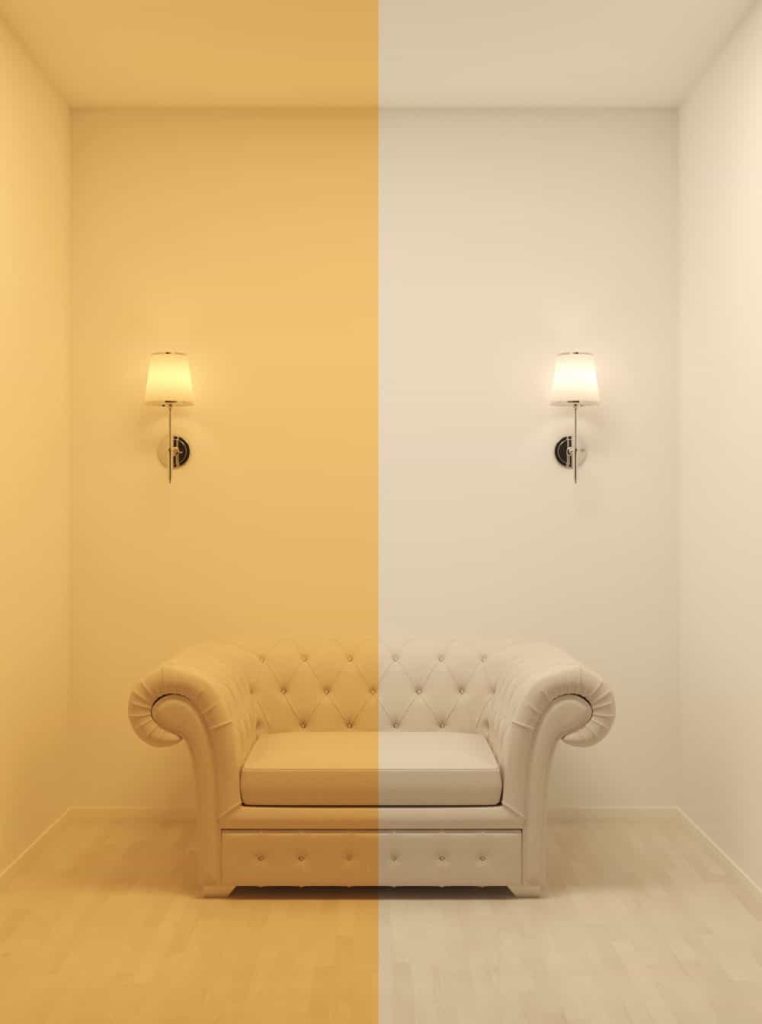
Warmer colours are generally better for your home, they are more relaxing and help you feel more comfortable. But if you have a working space like an Office or a Garage you should look at cooler colours to make you feel more awake and ready to work in these spaces.
You will note that some room recommendations are shared across colour temperatures – this is because your own perceptions and preferences are paramount.
All LED fittings will have the colour temperature on the packaging, make sure you check this so you have the right colour for the space you are lighting.
How much more efficient are LED lamps
LED’s are many times more efficient than traditional lamps, a 100W lamp puts out roughly 1500 lumens but we have found 15W lamps that can put out that same amount of light that is 85% or higher energy saving.
If you are interested in how to work out the efficiency of your LED lamps take the number of lumens and divide that by the power consumed (watts) and you will have the lumens per watt (lm/w). With some newer technologies we are getting around 100 lm/w and this number will only get higher in the future.

Life expectancy
Bulbs have an hour rating – an Average Rated Life (commonly referred to as life expectancy). This indicates how long a product is rated to last before a percentage (typically 50%) have failed.
For example, of 100 bulbs with a 15,000-hour rating being tested, it would be expected at 15,000 hours 50 bulbs would have failed, with 50 still operating.
A common misconception is that the hour rating on the box is some form of guarantee the bulb will last that long, it simply serves as an indicator of expectations but can be particularly useful for comparison between products.
It should be noted there can be a tradeoff with high efficiency LED lamps and life expectancy. Some manufacturers focus on high lm/w values and trade-off longevity for this, often more prevalent on cheaper ranges. A crass rule of thumb is that you can only select two properties out of high efficiency, high rated life & low cost.
It is important to match all the criteria of product to the application, eg, easy to service fixtures (on a low ceiling stud height for example) may suit an efficient, inexpensive light source, conversely with hard to reach or impractical to service fixtures (a stairwell for example) the priority should be placed on rated life.
What are Bathroom Wet Zones?
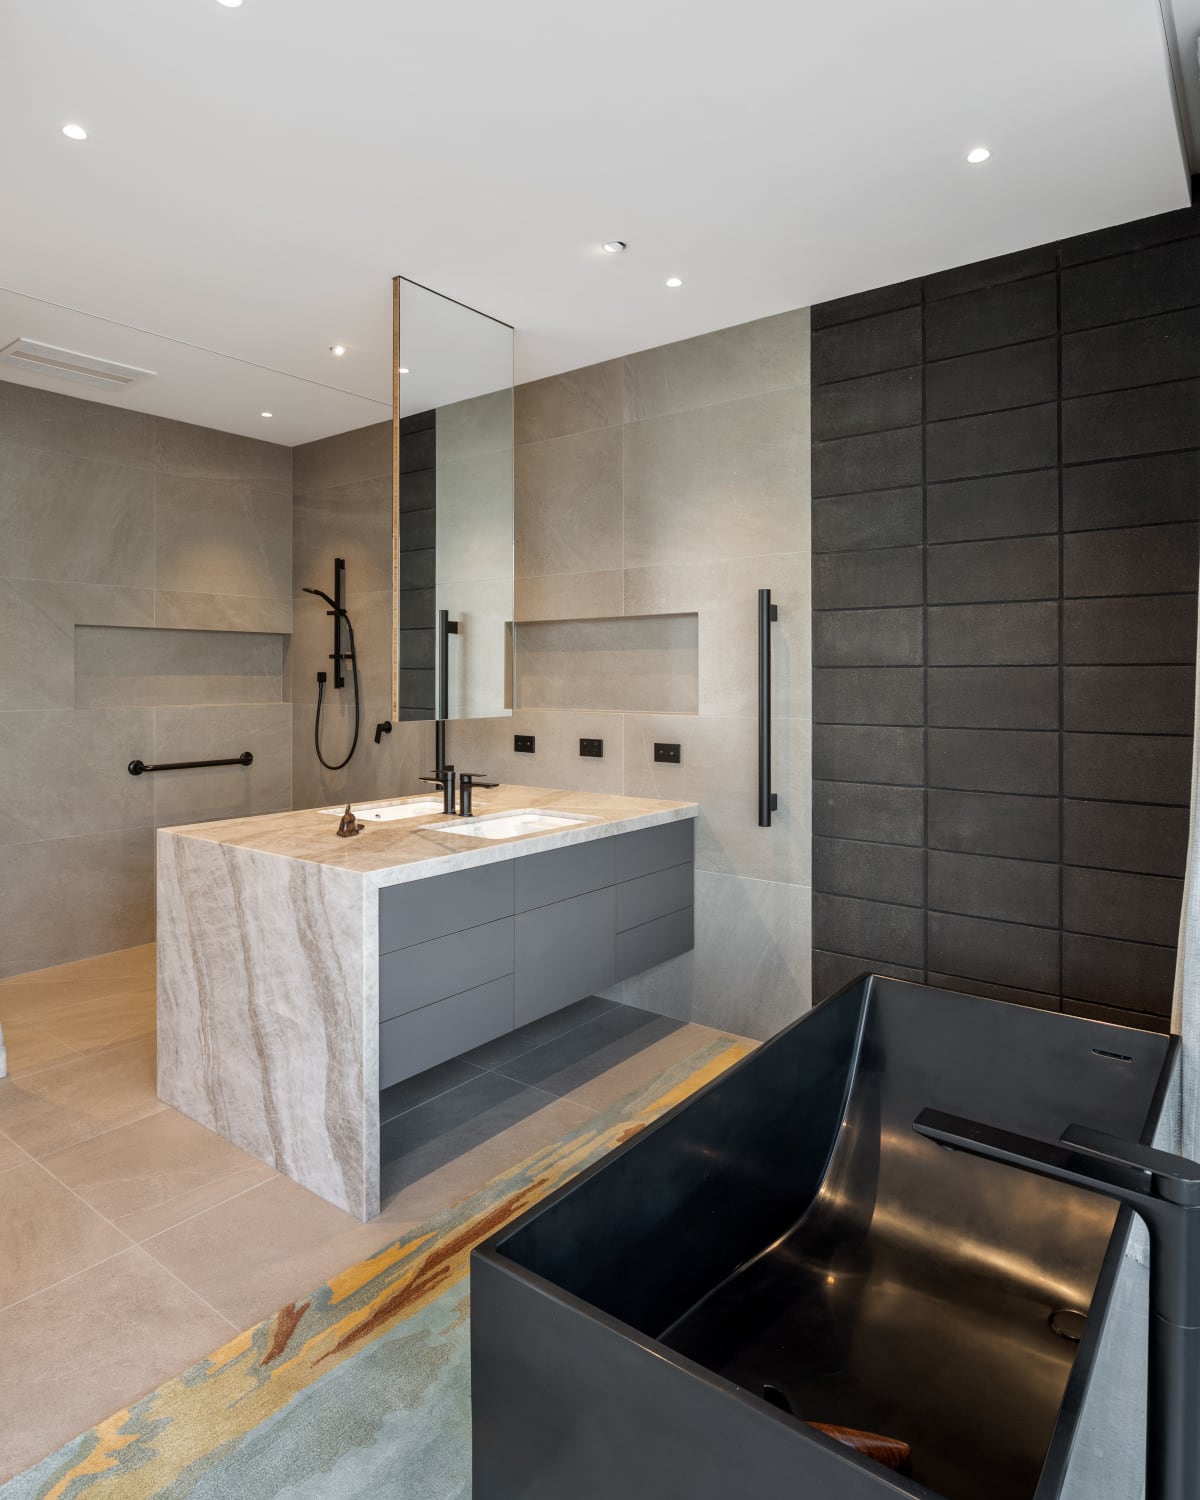
Electrical Bathroom Zones Explained

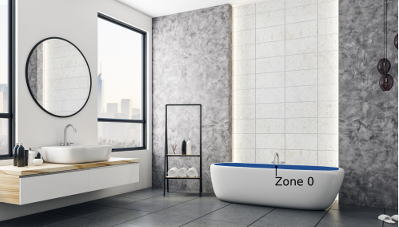
Zone 0
This zone covers the base of the shower and the inside of the bath, all light fittings used here must be at least IP67 and 12V.
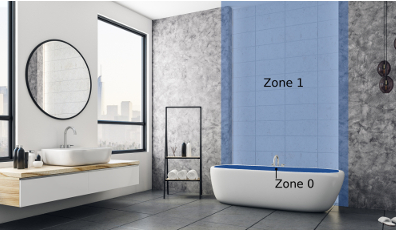
Zone 1
The area of this zone is directly above the bath and shower (to a height of 2.25m from the floor), all light fittings must be at least IP44.
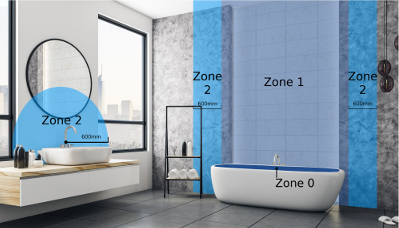
Zone 2
This last zone is the area 600mm from the shower cubicle and from the bath and also extends 2.25m from the floor. This zone also covers the area 600mm from the tap at the sink. All light fittings in this zone must also be IP44 or UL Damp Rated.
Tip: Be careful if your shower or bath are near your vanity, this may mean your vanity lights will get caught up in the Zone 2 600mm away from the bath or the shower.
What are IP67, IP44, UL Damp Ratings?
An IP Rating (Ingress Protection) is a light fittings protection from particles and moisture. In particular for bathrooms we are looking at Moisture. IP44 means a light is protected against splashes of water, where IP67 fittings are capable of being submerged in water for short periods of time.
The higher the second number in an IP rating the better, so an IP68 light may be used in place of an IP67 and an IP65 or higher light may be used in place of an IP44
UL Ratings are a standard from Underwriter Laboratories that you will find used on American fixtures. UL Damp and Wet rating has been recognised locally as suitable for use in Zone 2 provided a NZ Declaration Of Compliance is available. So a UL Damp rated fixture can be used in Zone 2 as a Vanity Light.
The main other point to check is that any light that is fixed inside the shower base is Extra Low Voltage, which means 12V, many LED fittings are available in 12V so if you have the desire for some feature lights inside your shower this shouldn’t be hard to find.
While Vanity lights that are outside Zone 2 do not need to have an IP rating these fittings are typically better designed for moist/damp spaces.
What IP Rating do downlights need in a bathroom?
Technically if they are above 2.25m from the floor they do not need an IP rating, however it is best practice to use a fixture that is IP44 or higher. Even the best ventilated bathroom has some moisture inside and this protects the light fitting and the driver behind from any moisture.
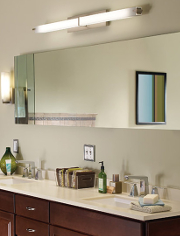
Over Vanity Light
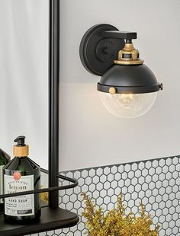
Side Vanity Lights